Just before I took the plunge with the Italeri Anti-Tank Obstacles, mainly for the dragons teeth, I scratch built almost 100 Czech hedgehogs. Here’s a guide so you can build your own too, if I can do it you certainly can!
This little project started with me scratching my head over how I create almost 100 of these obstacles for my Sword beach table. Early War Miniatures, Defence in Depth (via Grubby’s Tanks) and Italeri all are worth considering. However with the number I needed, commercial options weren’t really going to be friendly enough for my budget. While the Italeri ones are really good models, I’d need about 10 boxes worth! That would leave a lot of spare Dragons teeth!
Digging around my bits and pieces box I found a couple of Czech hedgehogs I’d made probably 30 years ago, from the venerable Hasegawa 1/72 Camp set. Using these as an inspiration and basic template, I picked up some L shaped styrene strips from the local model railway shop and got to work.
What you’ll need
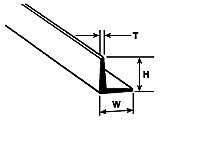
- 1.6mm or 2mm L angled styrene strips
- Side cutters or a sharp hobby knife
- Your preferred glue – I used superglue for speed
Step 1: Take a strip of your styrene and cut into short 20mm sections. Hot tip, whether you’re using a knife or side cutters ensure you cut each side of the ‘L’ one at a time. Otherwise if you cut in one snip you get a splayed effect. I learnt this the hard way. Once I’d got through one strip I thought there must be a better way of cutting and placing more quickly, so I created a quick jig using mdf bits. Perfect! After some trial and error I was in a good rhythm.
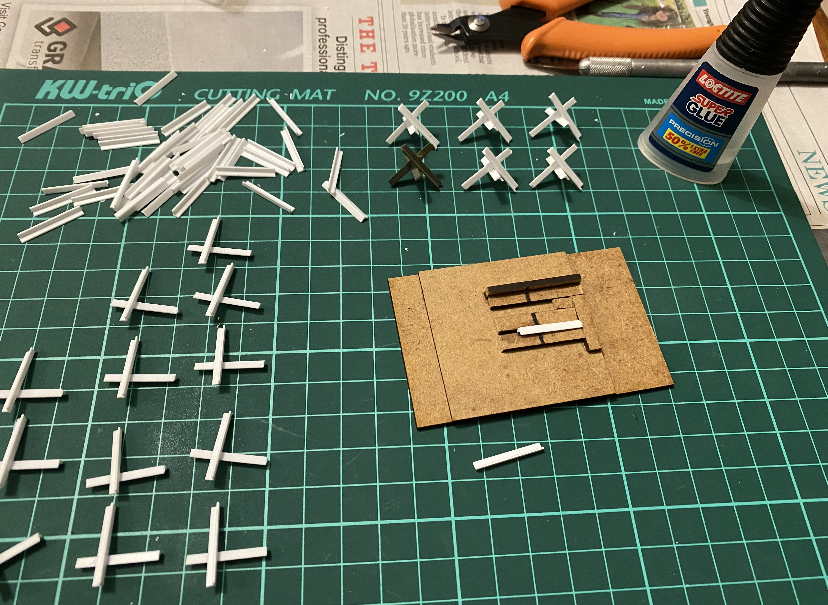
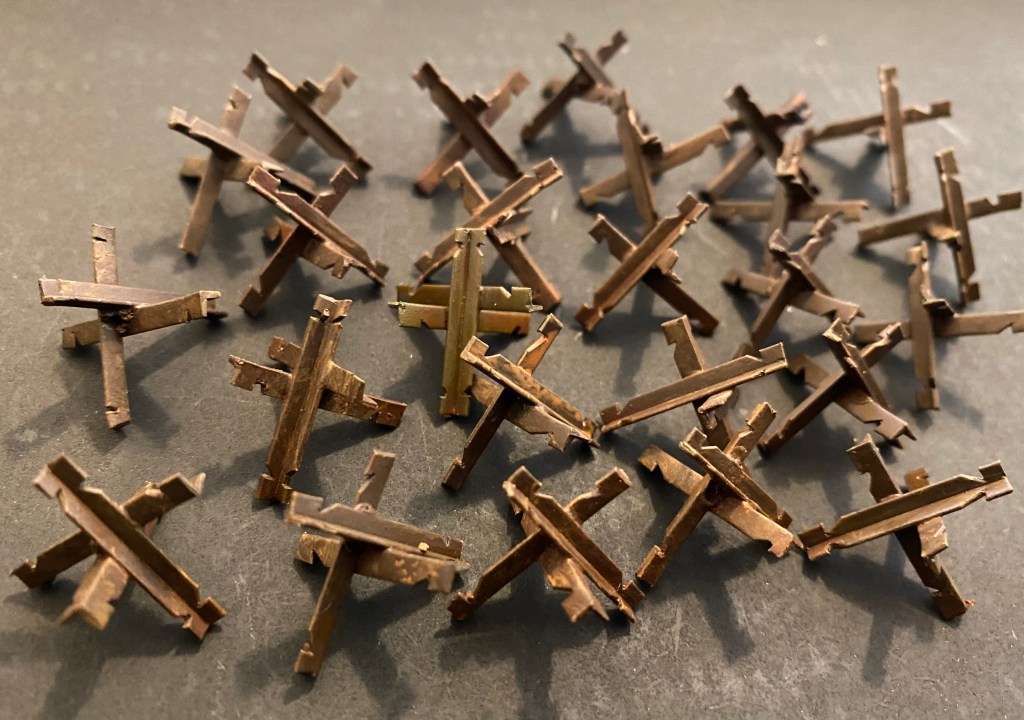
Step 2: Glue two 20mm sections into an X shape, attaching the two parts with a flat L edge to flat L. See bottom right of the photo above.
Step 3: Glue a third 20mm section into the top V of the X, and leave to dry.
Step 4: At this point I undercoated them all with a cheap rattlecan spray.
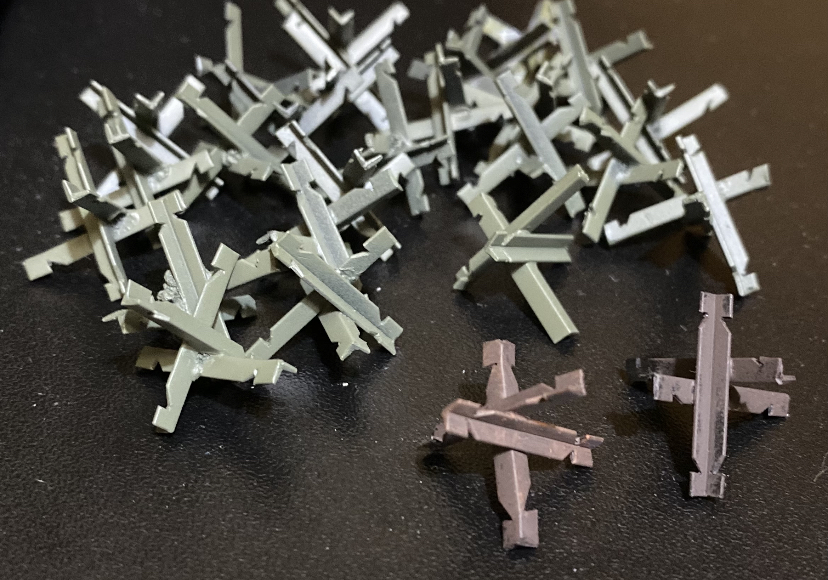
Step 5: While drying and checking further images of Czech hedgehogs, I realised many had a small nick in the edges of the beams to allow barbed wire to be attached. If you want to replicate this effect, take your side cutters and snip a very small triangle out of each leading edge a few mm’s from the tip of each beam/leg. This step took some time, and while I think it’s worth it, you could easily miss this out.
Step 6: Basecoated with Vallejo Dark Rust and left to dry overnight.
Step 7: Vallejo Rust wash liberally applied, left to dry overnight.
Step 8: Drybrushed with Vallejo Light Rust paying attention to edges.
Step 9: Final drybrush of Vallejo Orange Rust to bring out some further detail. I did this sparingly on some, more liberally on others, to create some randomness – I didn’t want dozens of uniform/identically finished Czech hedgehogs.
There we have it, DIY Czech hedgehogs. You could certainly drop a step or two of you don’t want yours as rusty. Likewise if you want more detail you could add in some small triangle reinforcers on the cross-bars, or concrete ‘feet’. For 15mm or 28mm, just use different width Styrene and adjust the length of your beams accordingly.
I’m pretty happy with these, knocked out over a weekend alongside other bits, and for about £10 they’ve ended up being very budget friendly too!
Next on the list, Belgian Gates.

1 thought on “SCRATCH BUILD: Czech Hedgehogs”