Having returned to wargaming during the pandemic after a break of around 20 years, I’ve only played small platoon level games and with a couple of rules systems. So this refight of the British landings on Sword Beach in June 1944 would be the largest and most complex game I’ve attempted to play in 20 years.
This also happens to be my first serious attempt at an AAR and my first proper Rapid Fire Reloaded (RFR) game.
Ian and I have been sharing notes, ideas and inspiration for his Gold and my Sword beach games for quite some time, and as the 79th anniversary of the landings were coming up we arranged a game. We agreed Ian would command his German forces defending the beach area and hinterland, whereas I’d be storming the beach with the completed elements of my British 3rd Infantry Division.
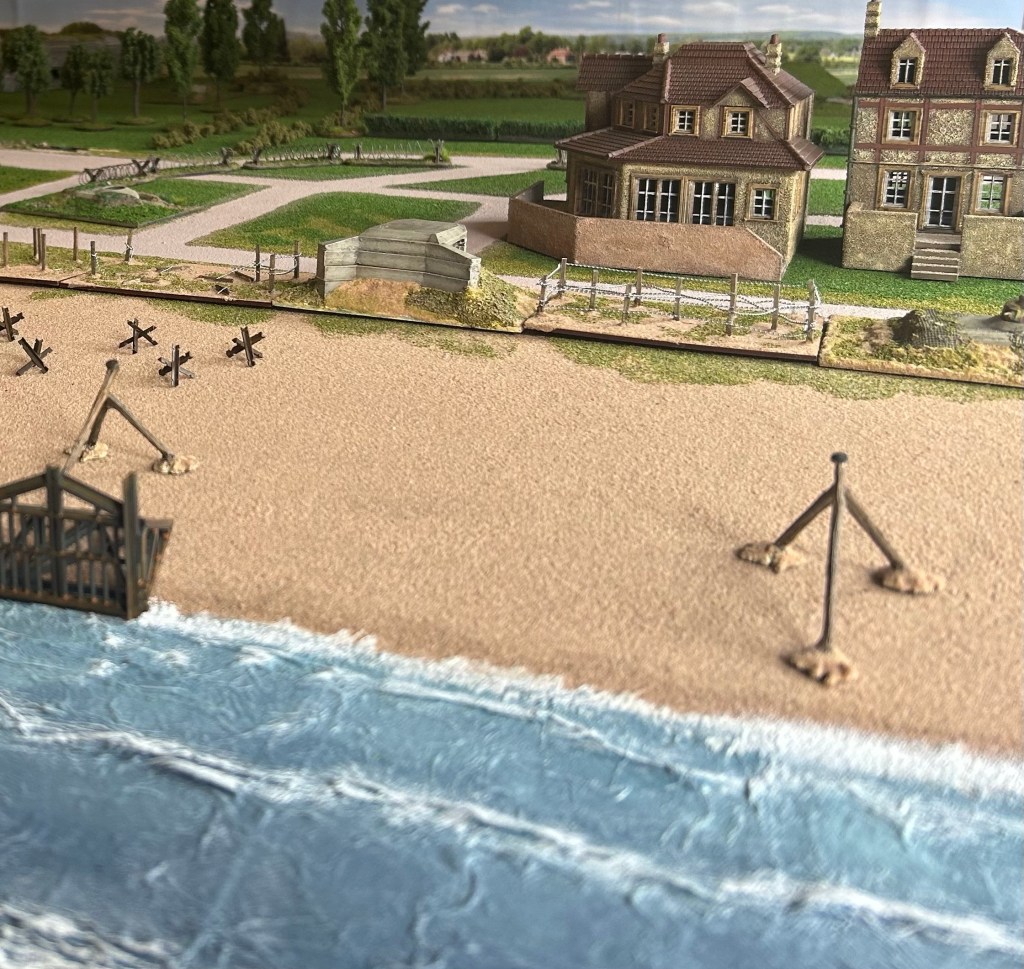
Unfortunately due to real life and time I didn’t get all the terrain completed or figures painted, so there are some WIP bits you’ll notice in the photos. However once battle commenced this was soon forgotten and barely noticed!
SCENARIO & OPPOSING PLANS
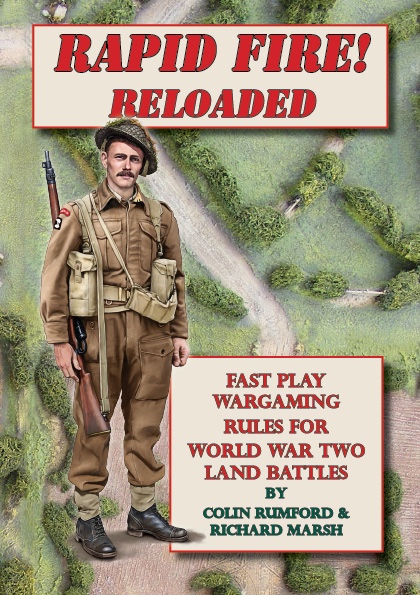
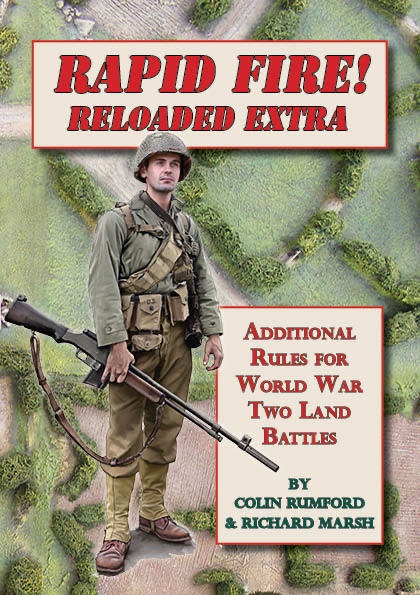
We played a revised version of Scenario 6: Sword Beach Landing as found in Colin Rumford’s Rapid Fire! Campaign Guide for D-Day.
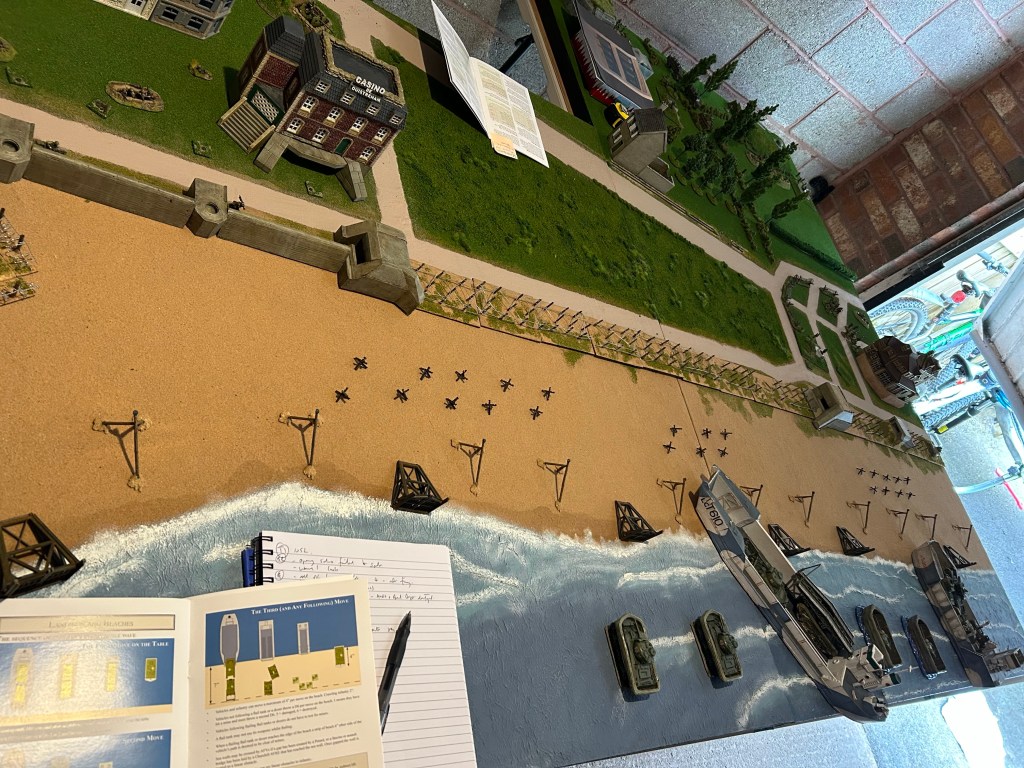
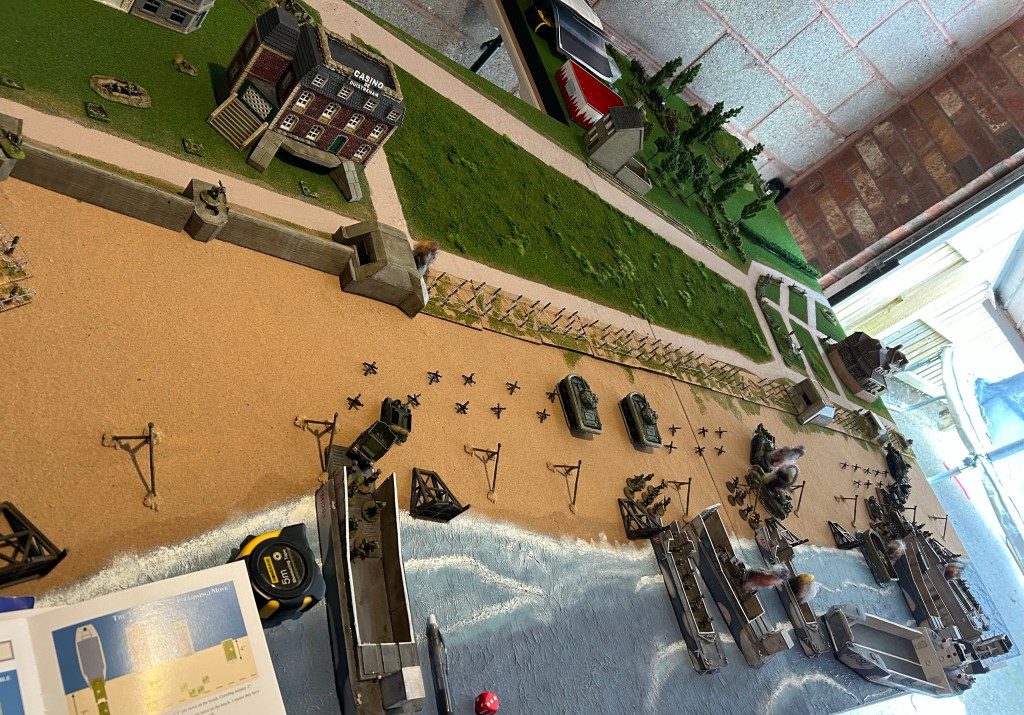
I had amended two of the landing waves and also re-drew the scenario map primarily to move WN16 Morris and WN 17 Hillman to better reflect historical reality. Critically, the flooded area at the centre will be impassable to vehicles.
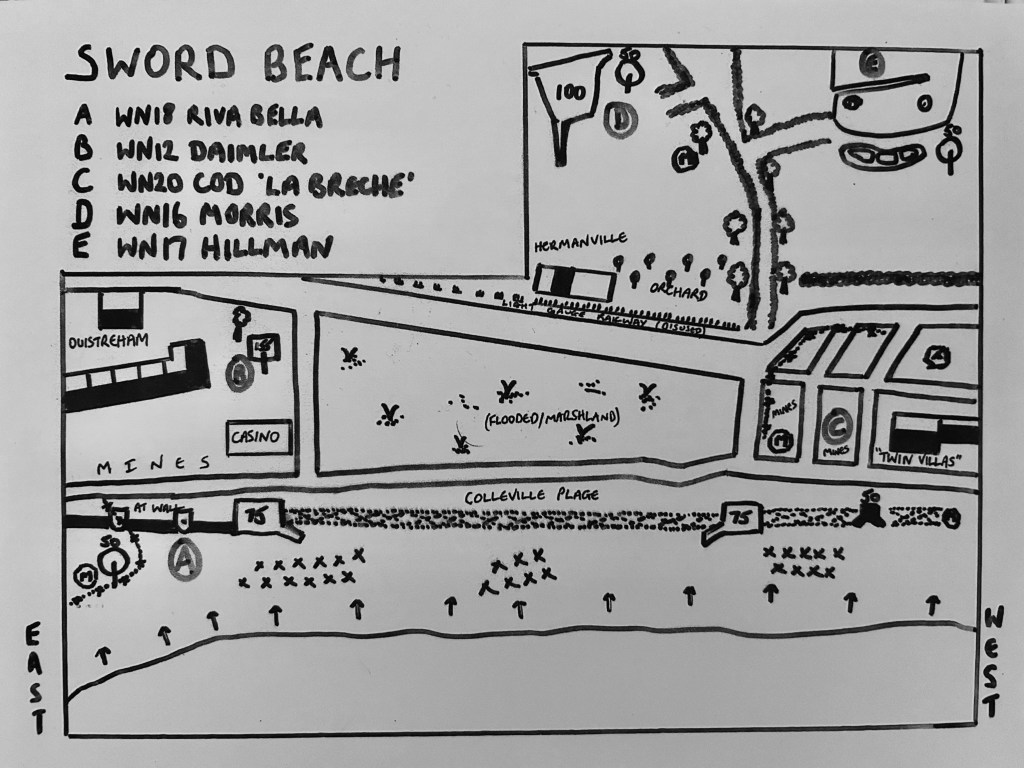
For the British forces, my victory objective was to control all five named strongpoints. Ian had to hold on to at least two for his victory. We had 16 turns and the clock was about to start ticking.
Ian deployed his forces largely as per the original scenario, mine were to land in 6 adjusted waves.


My plan was to simultaneously assault both the WN18 Riva Bella & Casino (“Riva Bella”) complex at one end of the beach and WN20 Cod at the other. Once Riva Bella had been captured by the East Yorks I’d move on to Ouistreham with 4 Cdo who would then follow through to capture WN12 Daimler with any remaining armoured support.
Meanwhile the South Lancs would capture Cod, once the Suffolks landed they would move through the South Lancs to capture Morris and Hillman. Each assault would be supported by an ASRE and a squadron of Sherman DDs, plus naval gunfire in support once the Naval Fire Control Parties had landed. What could go wrong?

After the game Ian disclosed his plan was to hold the assault forces off for as long as possible, and hope to hold them long enough that his reinforcements were able to join the battle during Turn 10. He anticipated putting a final stop line in around either Morris or Hillman, and to hold for a draw by holding at least one of those strongpoints.
OPPOSING FORCES: ORDER OF BATTLE
BRITISH 3RD INFANTRY DIVISION (elements of)
8th Infantry Brigade
- 1st Battalion, Suffolk Regiment
- 2nd Battalion, East Yorkshire Regiment
- 1st Battalion, South Lancashire Regiment
Divisional Troops
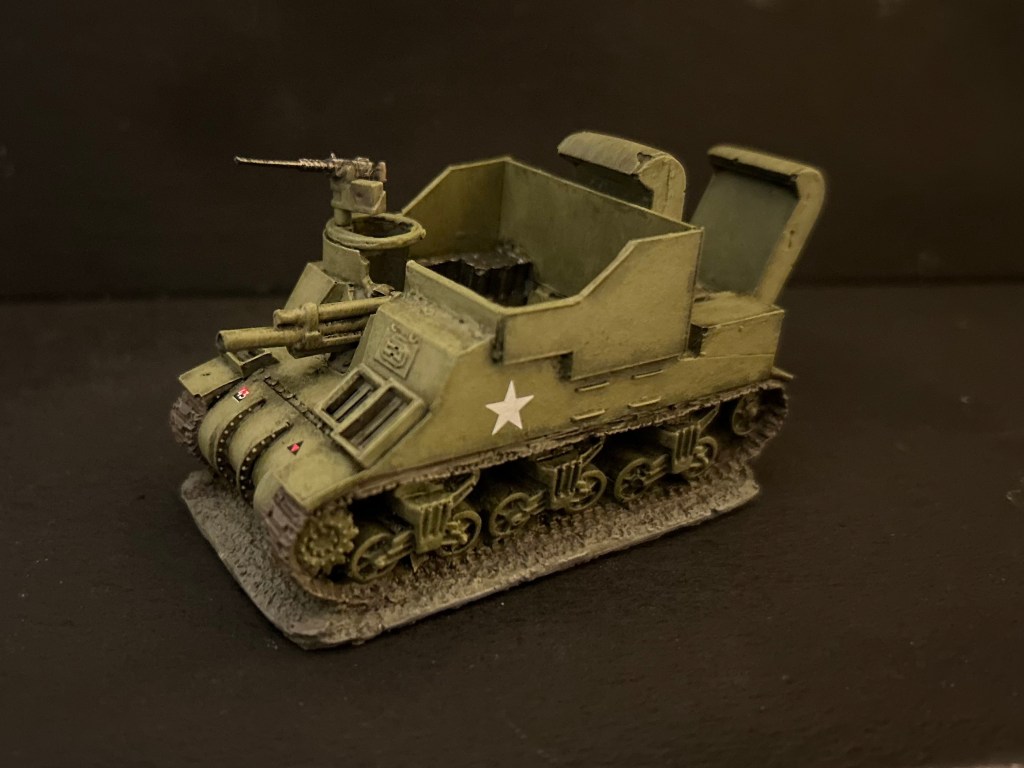
- 76th Field Regiment, RA (Priest)
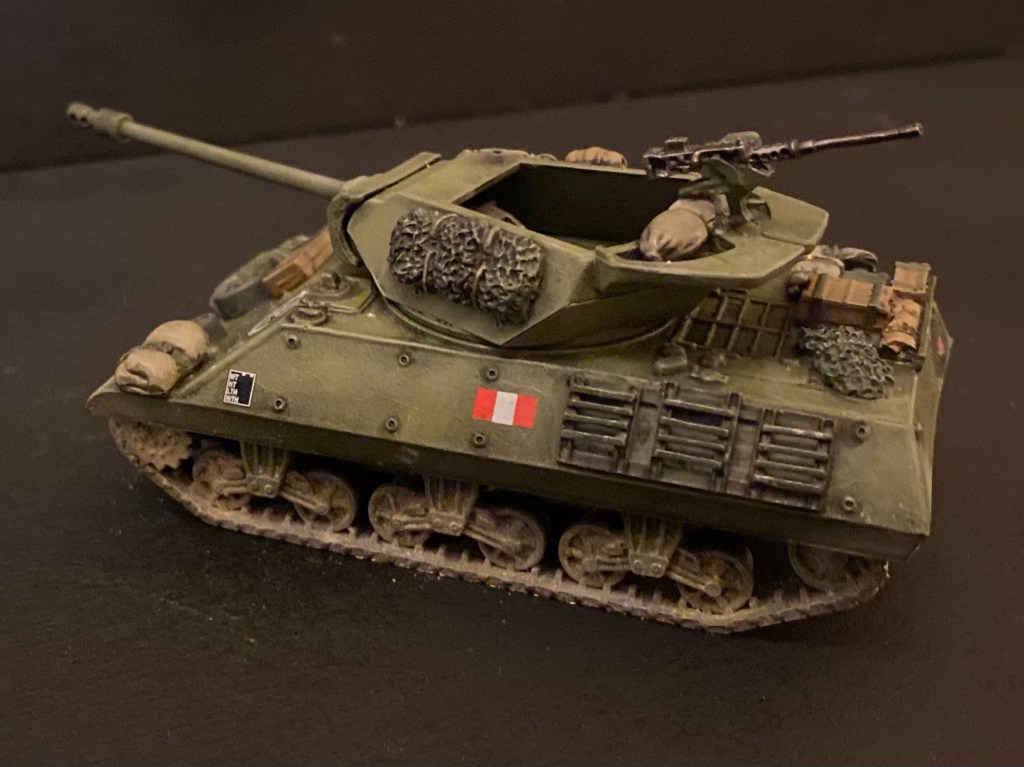
- 20th Anti Tank Regiment, RA (M10)
- 2nd Battalion, Middlesex Regiment (MG)
Attached Units
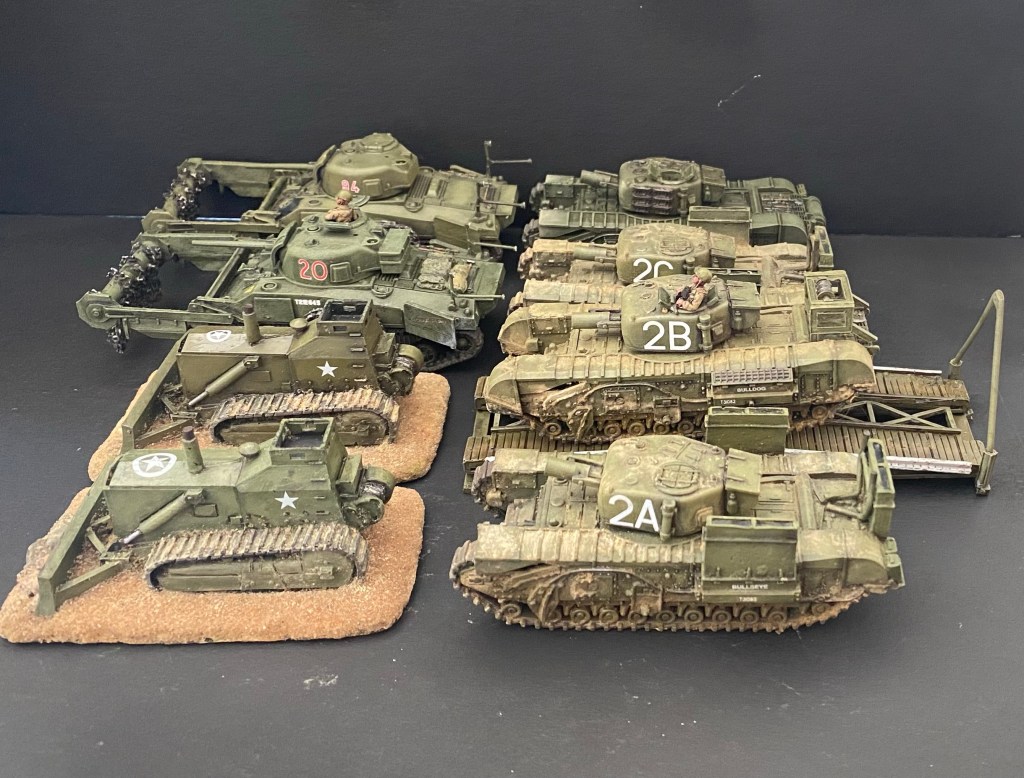
- 22nd Dragoons (Sherman Flail)
- 77th Assault Squadron RE (AVRE)
- 79th Assault Squadron RE (AVRE)
- 5th Independent Royal Marine Armoured Support Battery (Centaur)
101st Beach Sub-Area, consisting of:
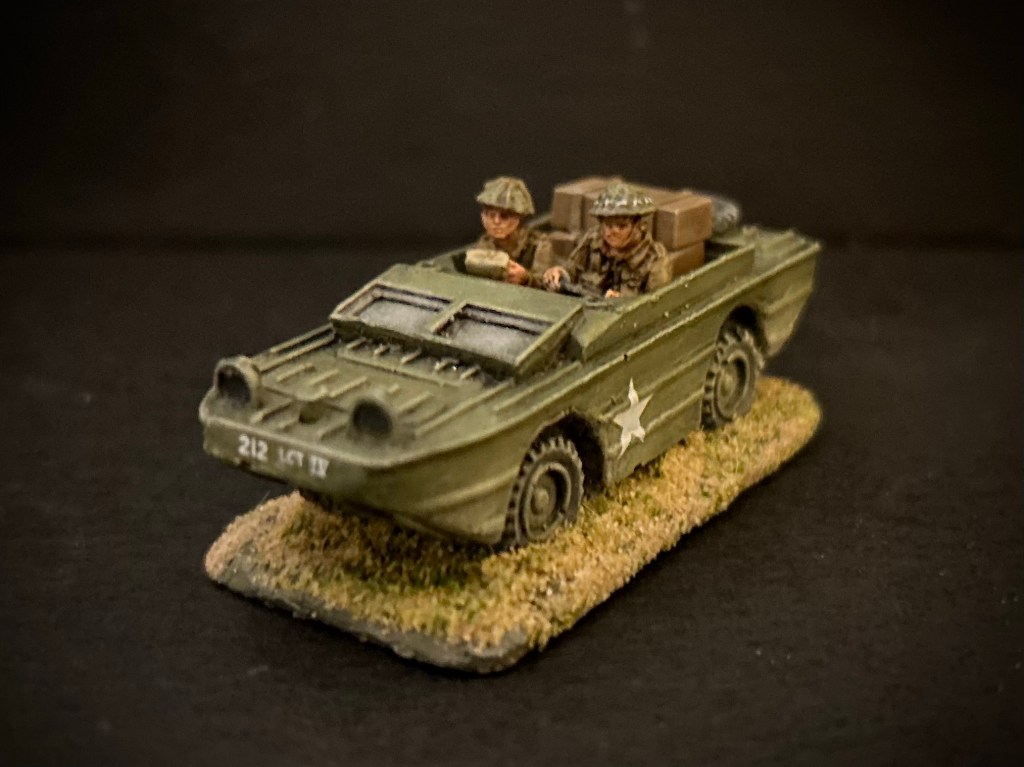
- No 5 Beach Group HQ (Ford GPA, Naval Fire Control Party)
- RN Beach Commando F
1st Special Service Brigade
No 4 Commando
27th Armoured Brigade
13th/18th Hussars (Sherman DD)
GERMAN 716TH INFANTRY DIVISION (STATIC)
736 Regiment
642 Ost Battalion
Divisional Troops
1st Battalion, 1716th Artillery Regiment (100mm howitzer)
716th Anti-Tank Battalion (Marder)
1st Battery, HKAA 1260 (155mm howitzer)
THE GAME: SWORD BEACH ASSAULT
TURN ONE
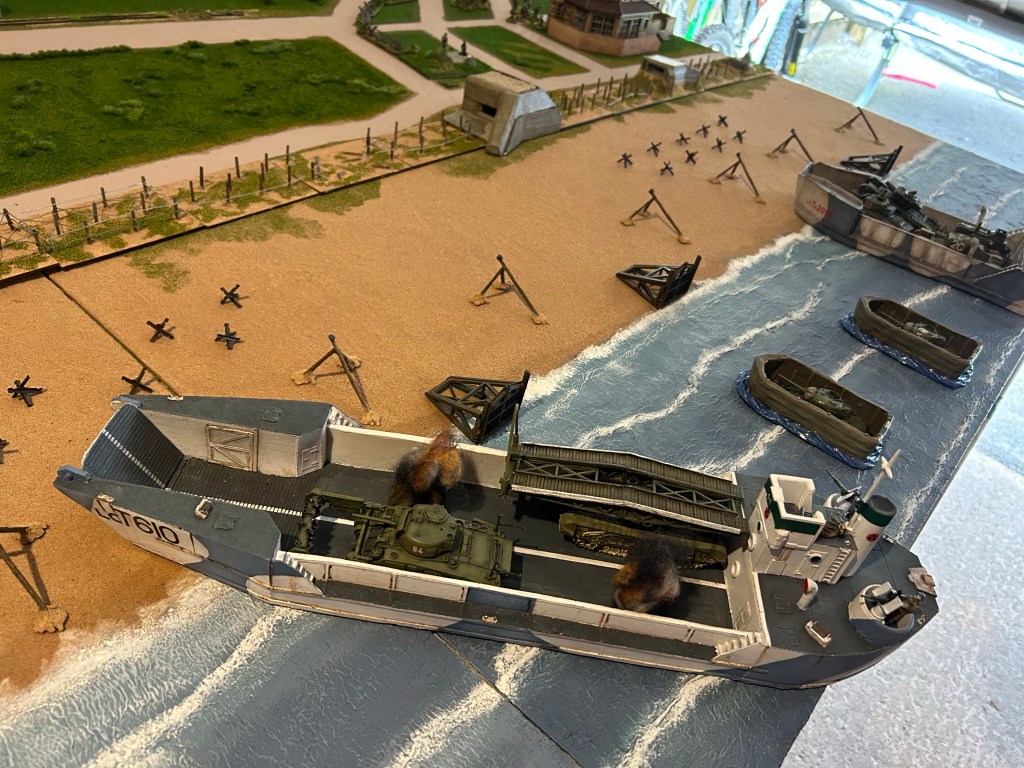
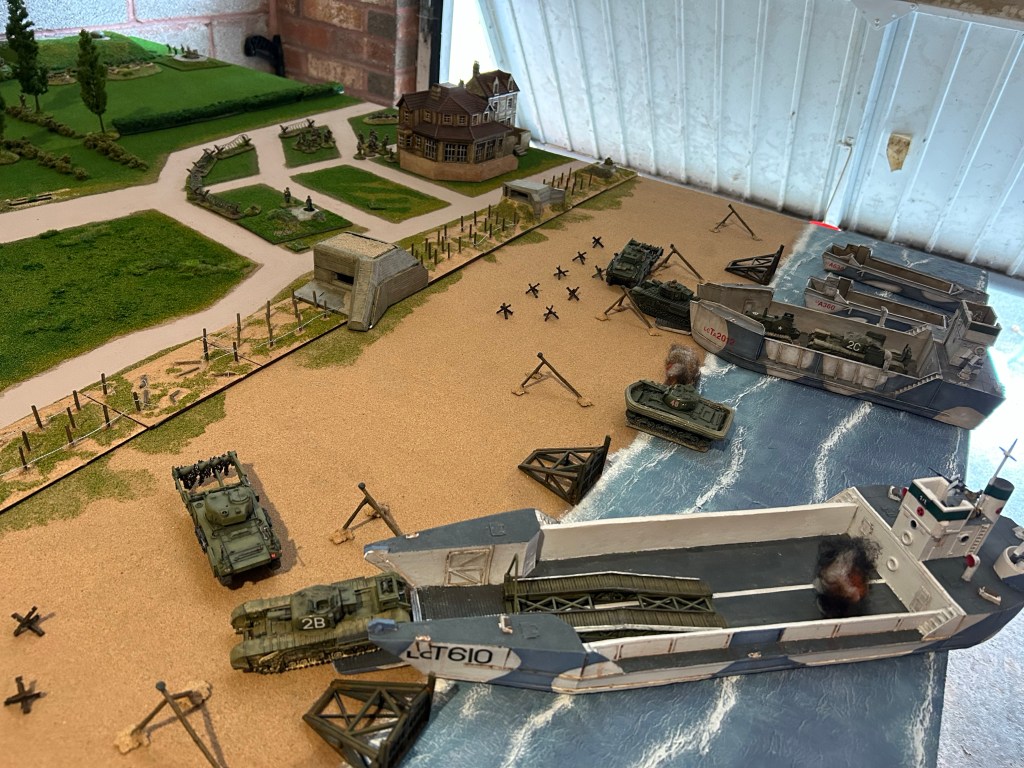
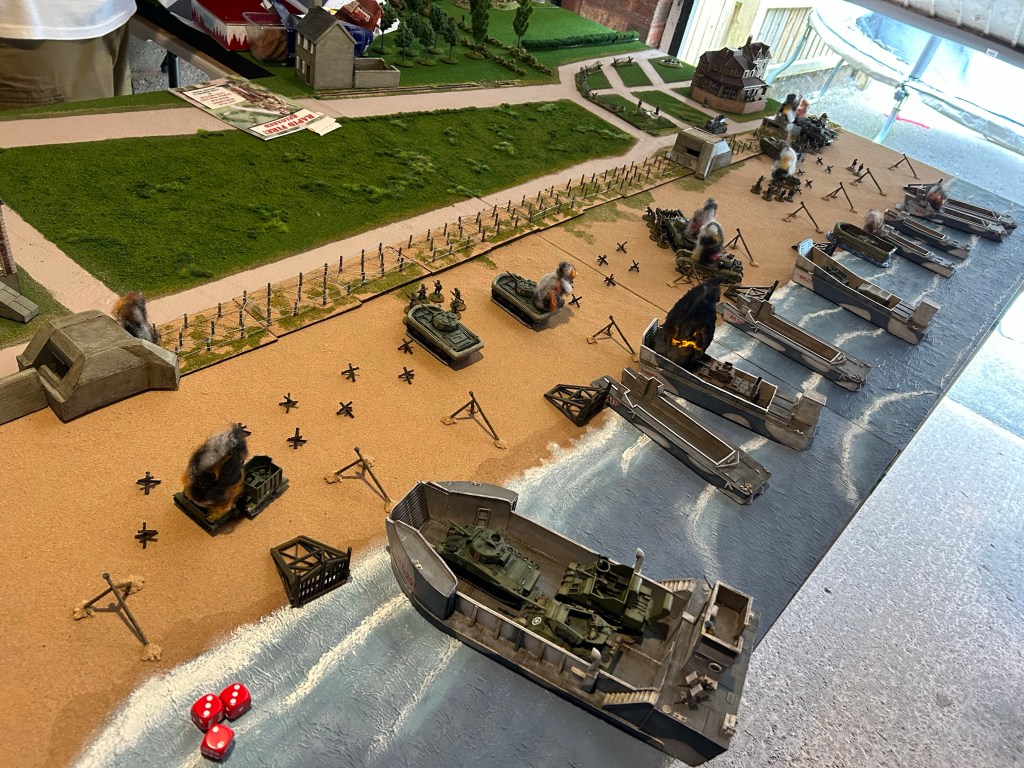
The first assault wave begins making its approach to the beach. Two LCTs carrying Churchill AVREs, Sherman Flails, and Armoured Dozers of 77 ASRE and 79 ASRE ready to hit the beach. An opening salvo of naval gunfire supposed to soften the defences fails to spot, probably due to low cloud, so the guns remain silent.
Due to Ian rolling a 4, we discover the British Paras have successfully captured the off-table Merville battery meaning the defenders won’t have the benefit of the battery firing in their support. However with his OP team in Riva Bella spotting for Morris and Daimler, both open fire on the approaching LCTs. The guns of Daimler miss, but Morris’ fire is effective: shells landing on LCT610 destroy an AVRE and Armoured Dozer.
TURN TWO
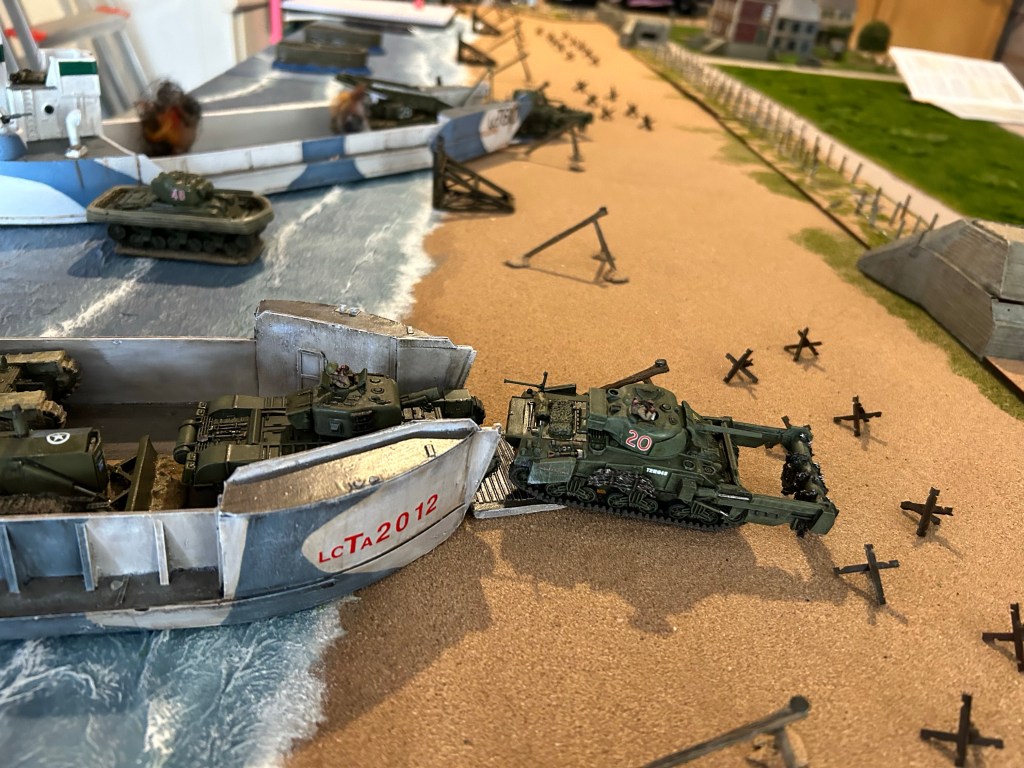
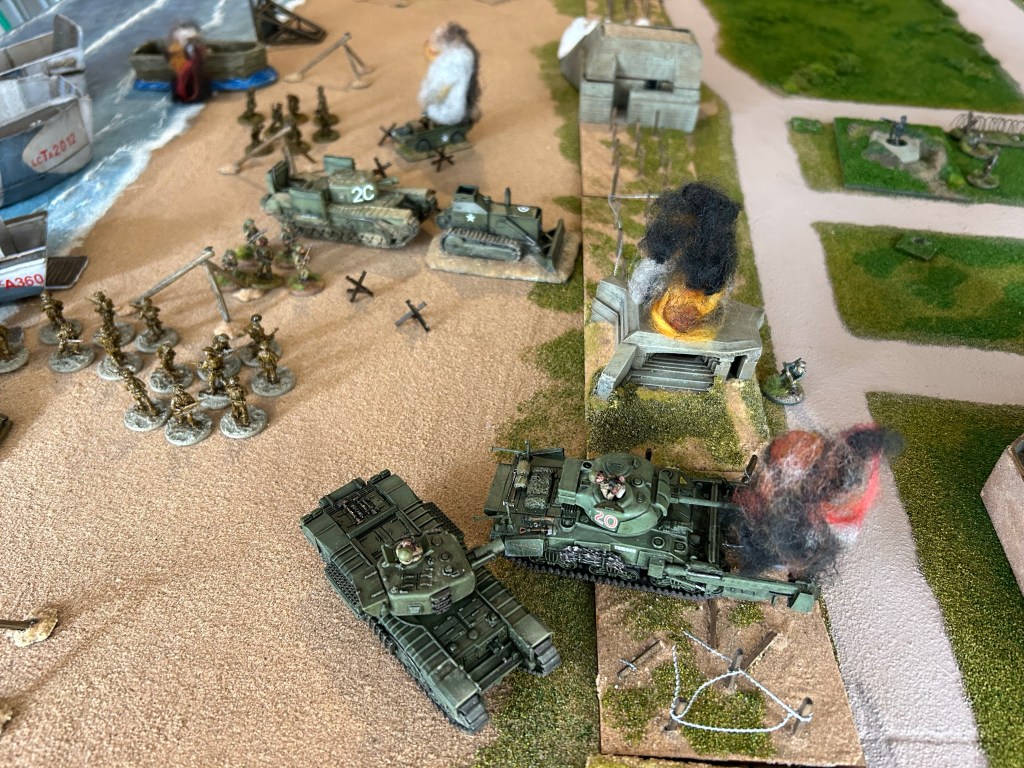
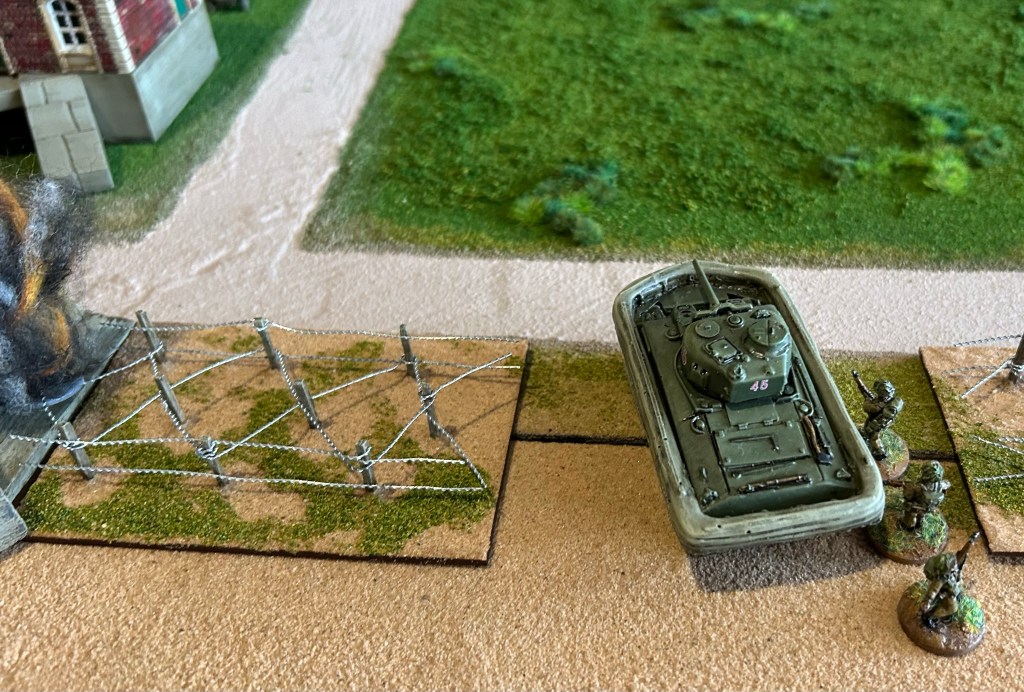
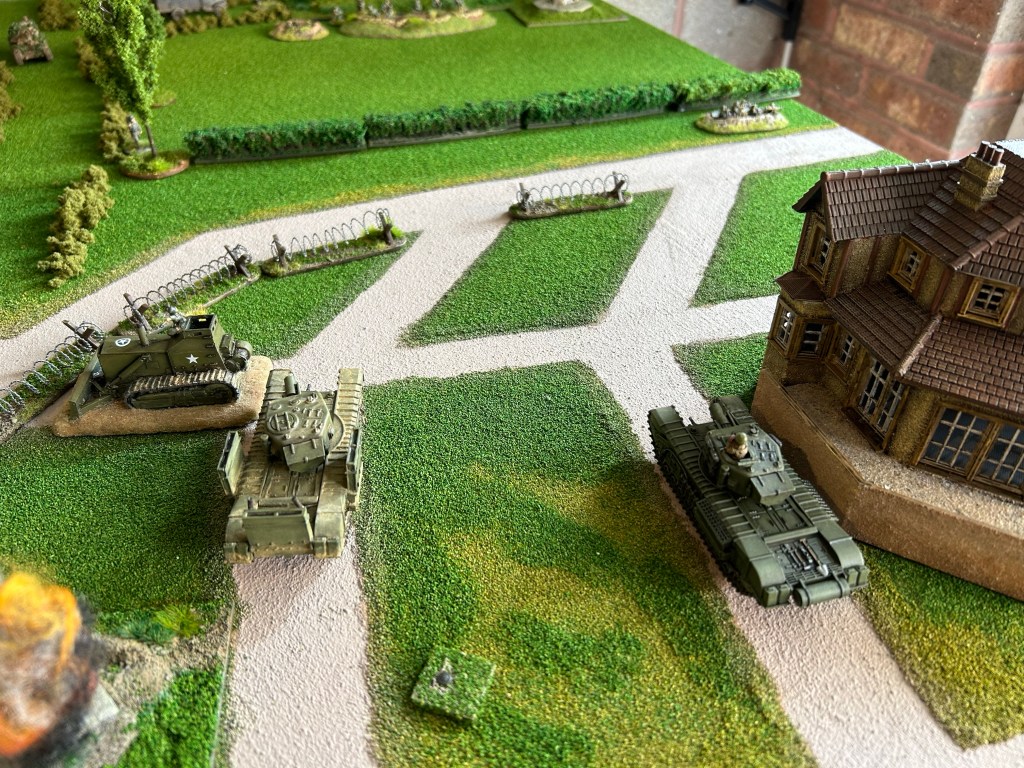
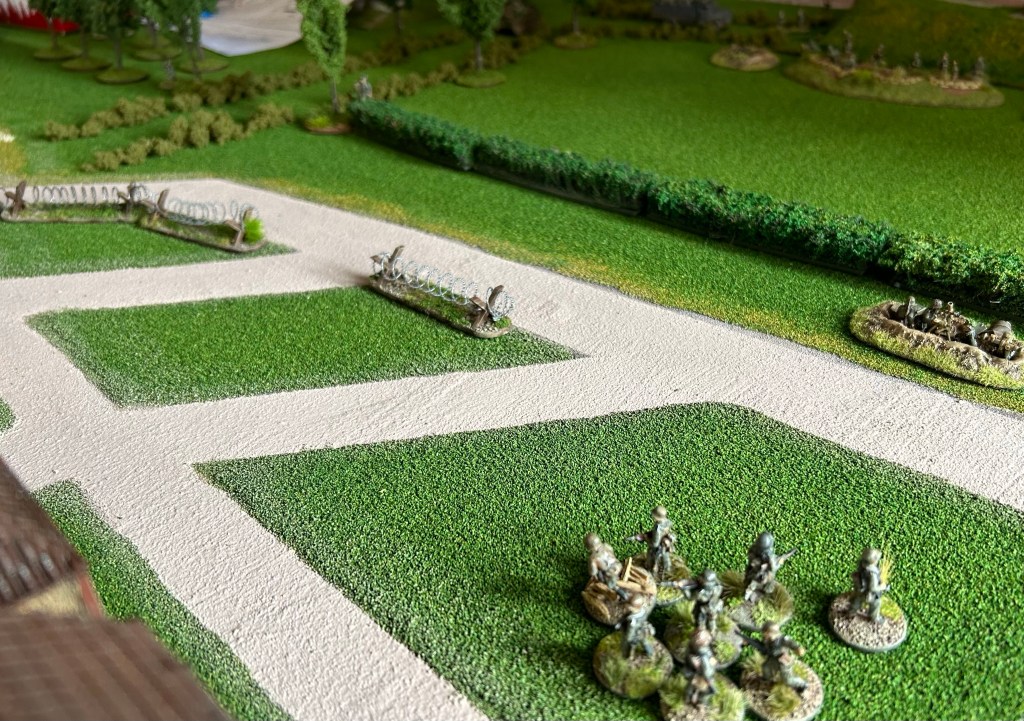
Sherman DDs of Wave 2 are launched but three founder on the approach, that’s half of them lost without firing a shot. Meanwhile the LCTs hit the beach, LCT2012 on target but LCT610 drifting 6” to the right. ‘Hobart’s Funnies’ start disembarking from both, led by flailing Sherman Flails. While we know the beach wasn’t mined historically, the assaulting troops don’t know it. So the Flails will flail for mines until they breach the barbed wire obstacles running across the top of the beach. I’ll miss their firepower in the next few turns!
Riva Bella’s casemated 7.5cm gun, Morris & Daimler batteries, and the Cod 5cm Doppelschartenstand all begin to shell the landing beach with most of the fire focused on the Sherman Flails. Most shells miss, but the Cod 5cm gun gets a hit on Sherman Flail turret number 20. It’s a glancing hit as no damage is received.
At this point I start to wonder if any of my armour is going to make it off the beach! But I know there are more waves to come and it’s still early.
TURN THREE
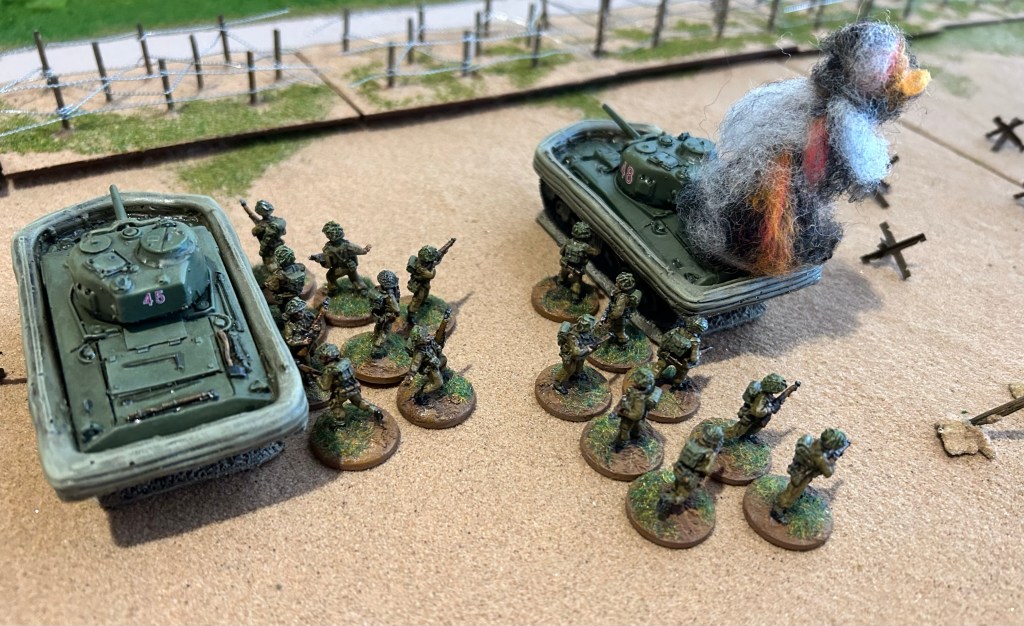
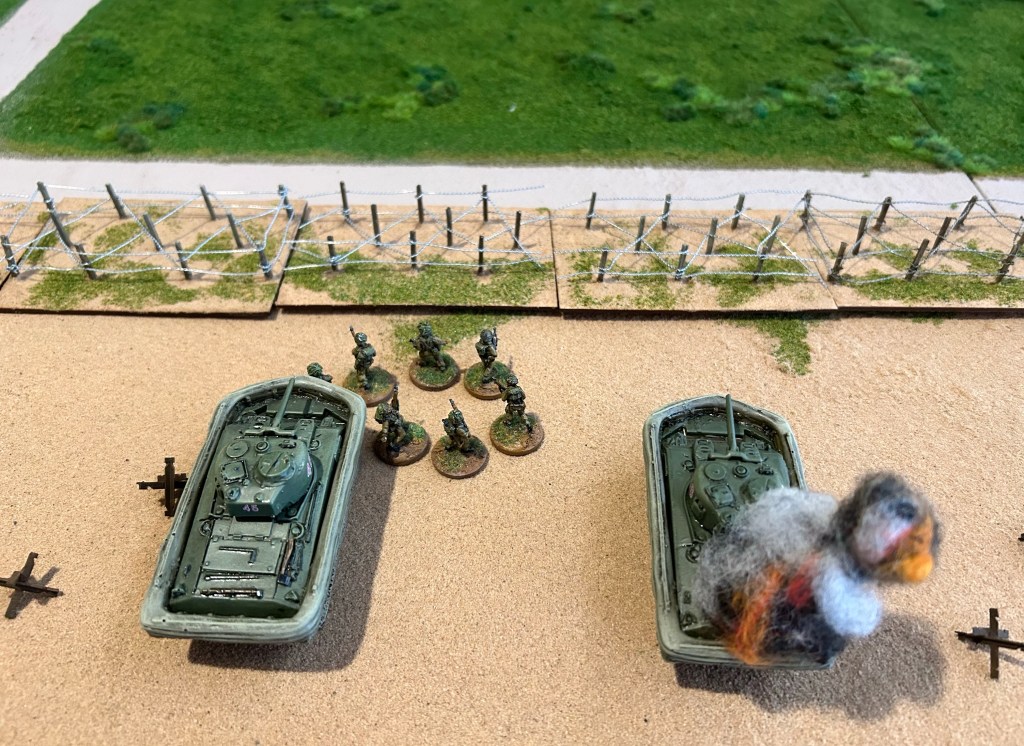
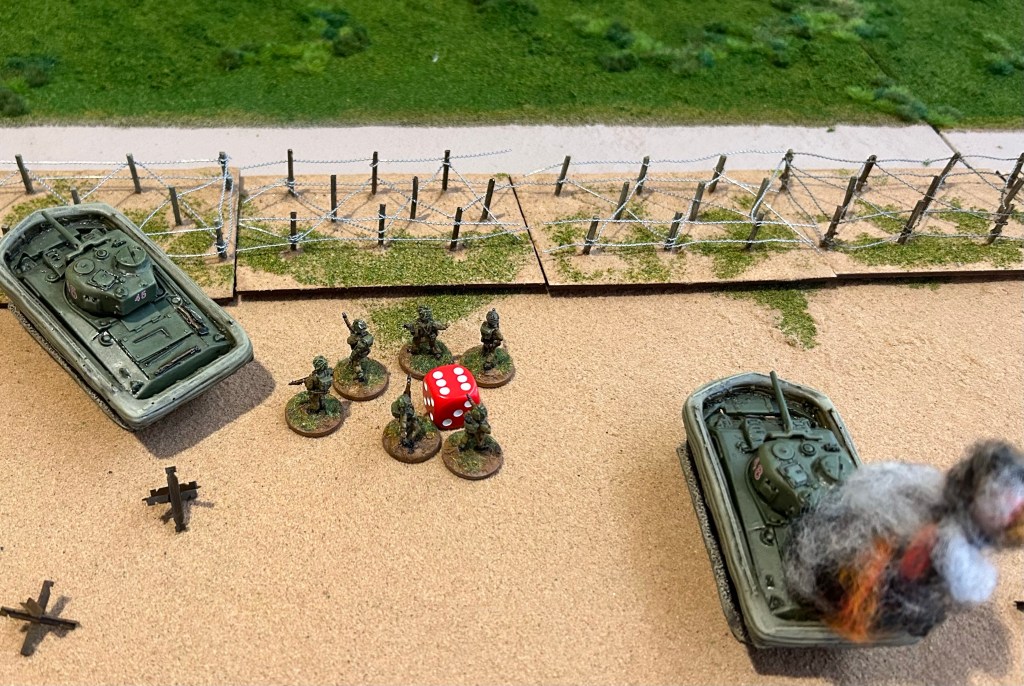
Wave 3 is on the approach now, LCAs chugging to shore carrying assault companies of the East Yorks and South Lancs. The three surviving Sherman DDs hit the beach, but again with mixed success. One drifts to the left 6” and lands, another drifts in the tide and narrowly avoids hitting a mined Belgian gate beach obstacle. DD 48 hits a mine while moving forward through the surf and is immobilised. While the DDs are struggling to get ashore, AVREs begin disembarking from the LCTs, following behind Sherman Flails.
A DD on the left spots an AT casemate at Riva Bella with a commanding view down the beach, and commences firing on it. In a lucky shot it’s hit and destroyed. This might seem like a small win, but after losing several DDs and 25% of my funnies in the first 20 minutes of combat, this was a morale booster!
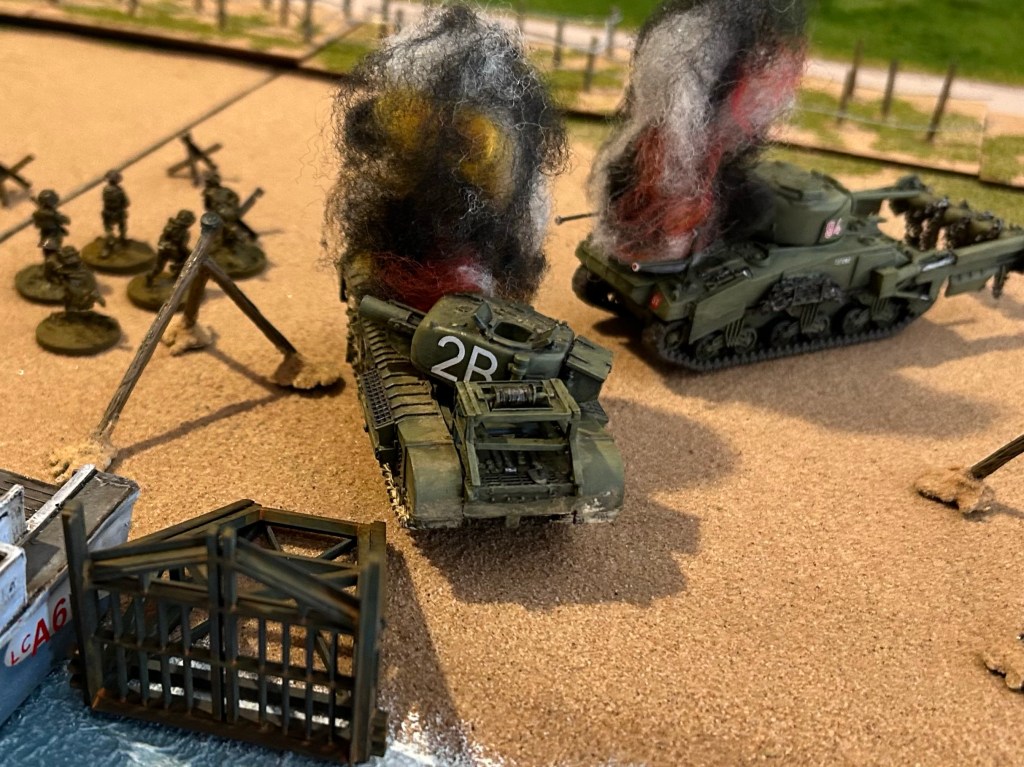
Ian doesn’t sit idly by, and heavy fire continues onto the beach. Riva Bella’s fire being ineffective on the eastern side, but Cod proves more successful on the western with Sherman Flail 94 and AVRE 2B (an SBG) both immobilised. More pain comes in the shape of Morris and Daimer indirect firing HE onto the approaching LCAs. Daimler’s guns miss again but LCA635 takes a direct hit from Morris resulting in nine casualties, essentially wiping out a company of the South Lancs.
TURN FOUR
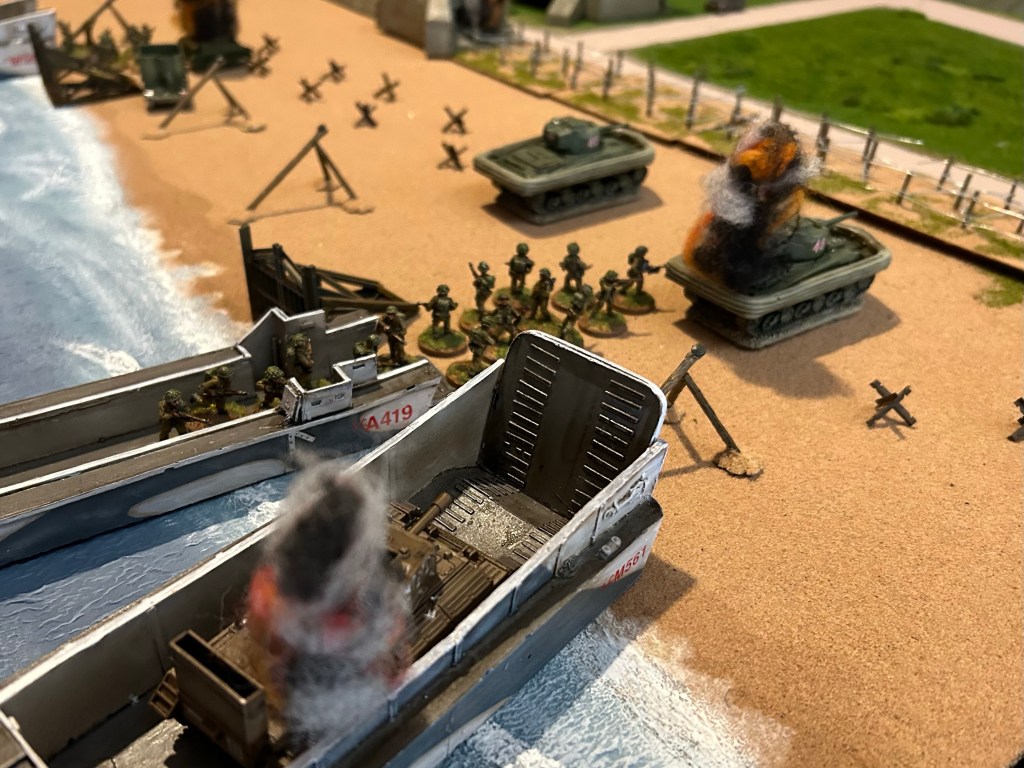
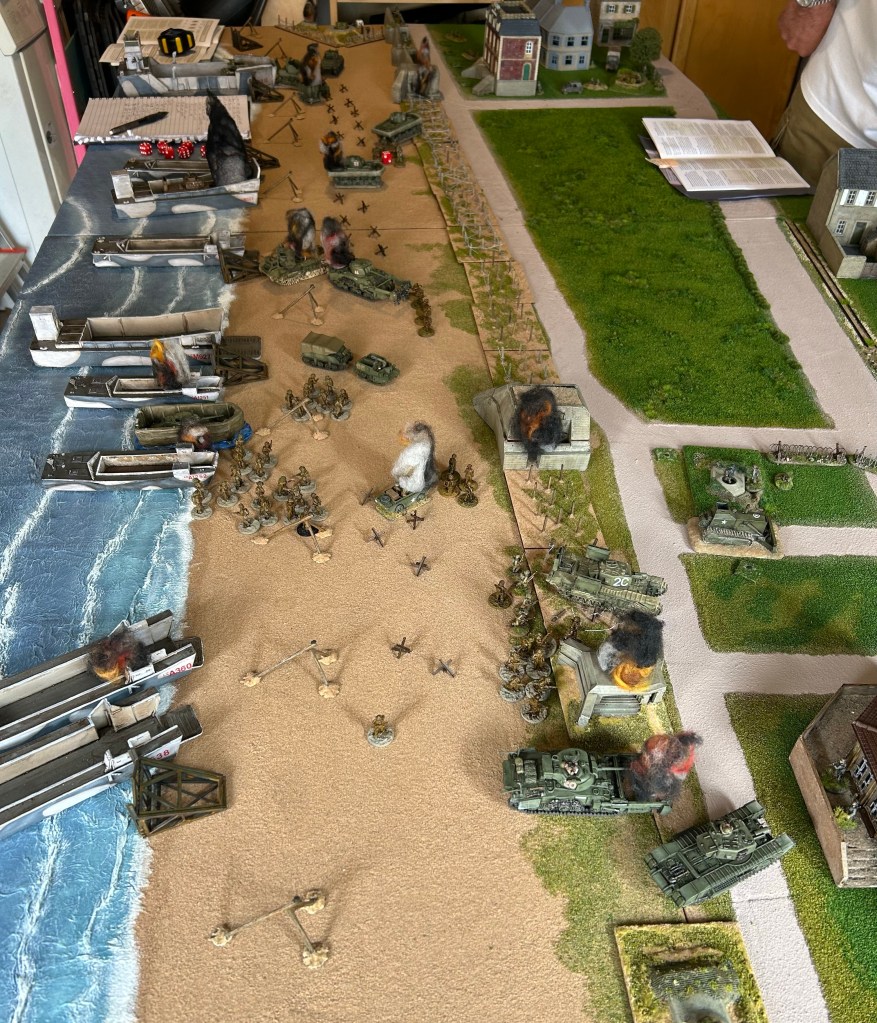
As the remaining Flail and AVREs work forward up the beach, Wave 4 LCMs start their approach and the LCAs of Wave 3 begin hitting the beach, but it’s carnage in the surf.
All the LCAs are drifting. LCA635 can’t avoid hitting a mined Belgian Gate and two more casualties are taken by the East Yorks. Another LCA collides with an LCT. The South Lancs fare even worse, taking casualties through a mine strike and then LCA360 hits a mine. Watching the dice roll my heart sinks as the South Lancs take another eight casualties.

Morris and Daimler open fire again at approaching landing craft, this time LCMs. All they hit is water. The bunkers in Cod keep up their withering fire, Flail 94 takes a second hit and brews up. AVRE 2B therefore takes the first morale test of the engagement, the shaken crew have seen enough in the last hour of action and take no further part in the battle. Just to make sure, the 5.0cm fortress gun pops another shot into AVRE 2B.
At this point I realise it’s going to be more of a challenging game than I first thought; British forces are running at around 25% infantry casualties, two thirds of the Sherman DDs are lost or immobilised, and half of the specialised armour has been lost. German forces have so far lost one AT casemate.
TURN FIVE
Strong tidal conditions wreck havoc again but this time on the LCMs of Wave 4. All three drift and as a result of hitting obstacles, the South Lancs lose one of their valuable Carriers. The second LCM lands without damage but the third strikes a mine and boom, I lose my RMASB Centaur.


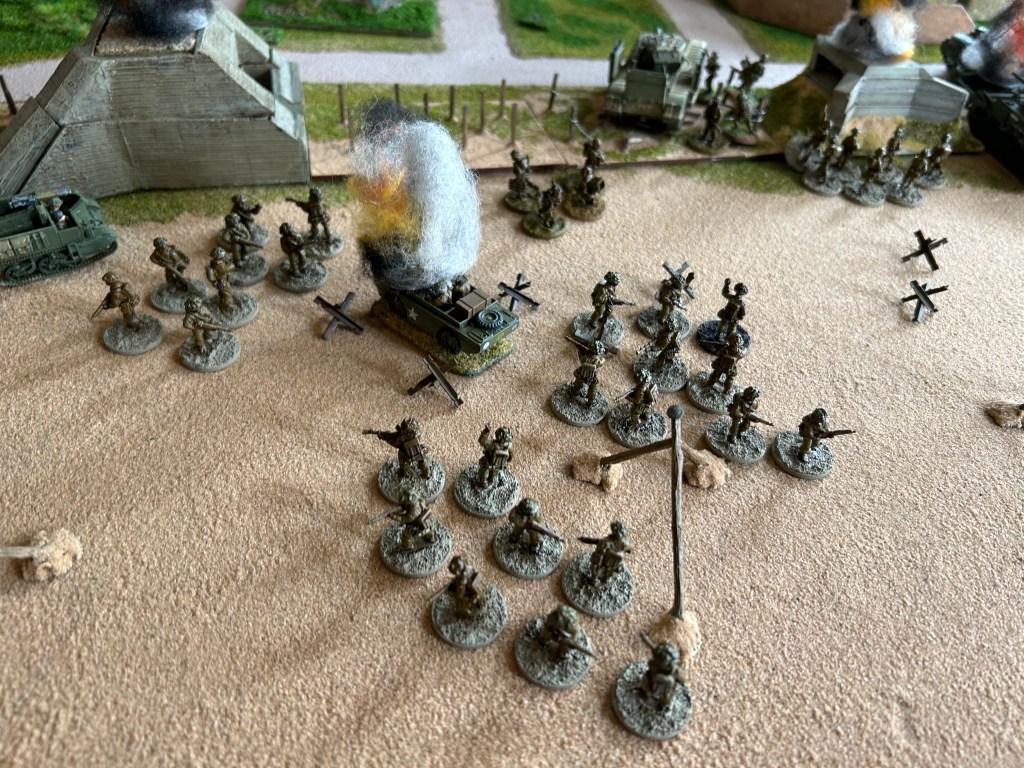
Seeing the results of heavy enemy fire, the infantry of both committed battalions are now edging forward, crawling up the beach and scrambling for cover behind armoured vehicles where they can.
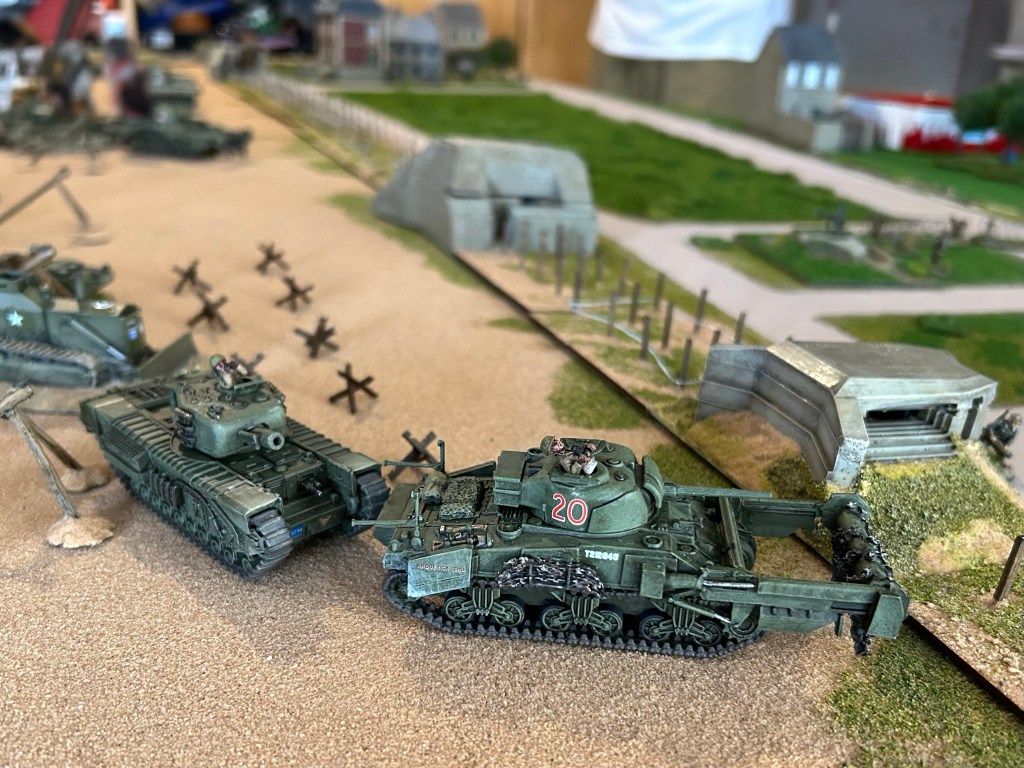
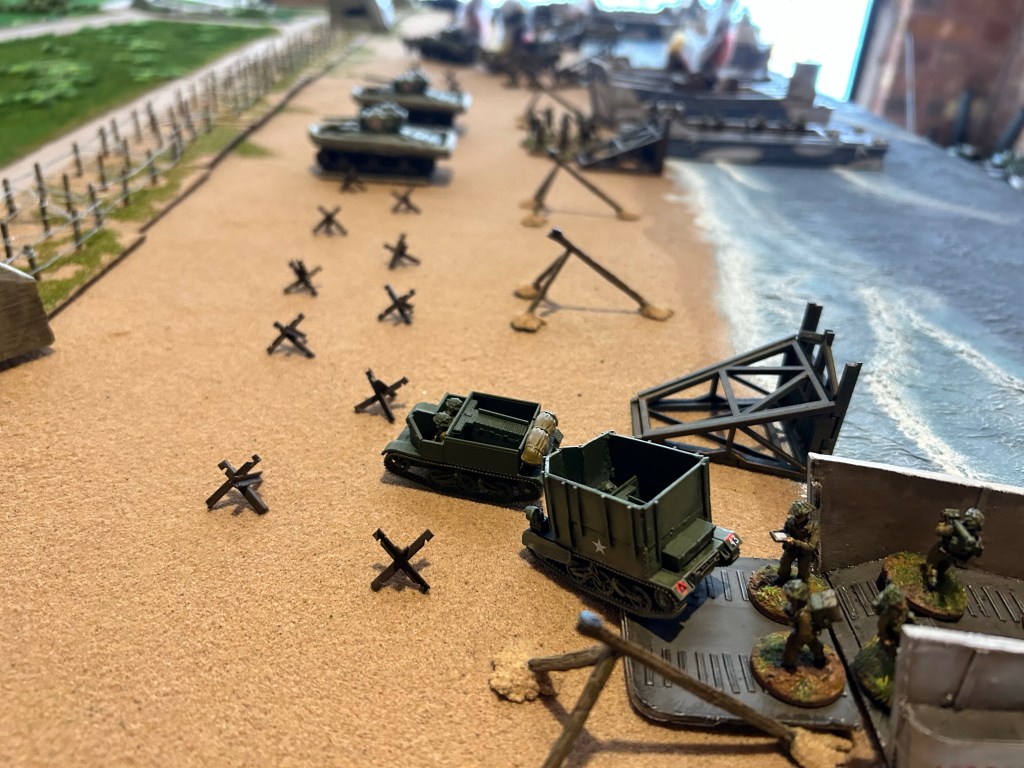
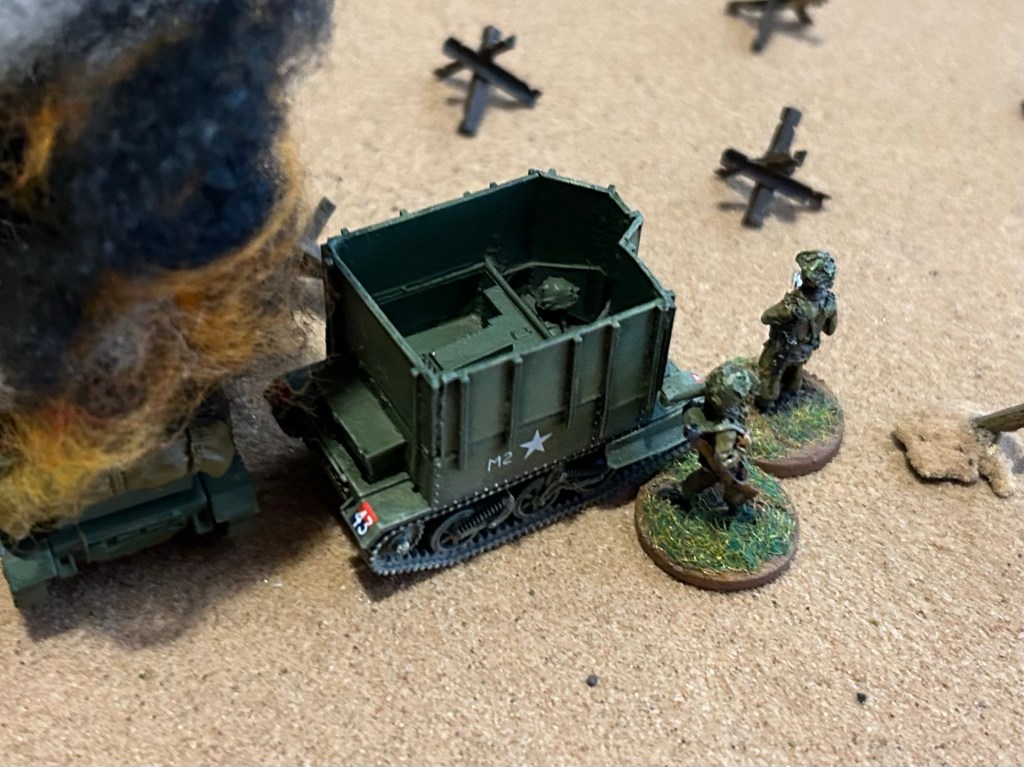
Against a backdrop of heavy casualties, on the western side the remaining and fully intact ASRE is moving up the beach towards Cod, Sherman Flail 20 reaching wire obstacles directly in front of the position and preparing to clear an exit for following infantry. Priority vehicles start landing from the LCMs, including Naval Fire Control Parties in a Carrier and Ford GPA amphibious jeep.
Daimler & Morris conduct IDF HE with no effect, while the guns in Cod destroy one of the immobilised DDs. East Yorks HQ Company and vehicles take incoming rounds from MG Tobruks and small arms in the Riva Bella complex, knocking out a Carrier.
At this stage I decided to hold the next wave to create some space on the beach and retire the LCTs for future waves. However with the events of the next couple of turns I completely forgot to retire the LCTs or to land 4 Cdo on the extreme east. School boy error there as they say, let’s assume the pilotage craft couldn’t correctly identify where the Commandos should land due to the tidal conditions, low cloud, smoke…
TURN SIX
Most of the British forces on the beach are moving forward cautiously, including the infantry who are mostly crawling to try and avoid the intense enemy fire. The remaining fully-functional DD stalls for a turn due to failed morale, and the East Yorks bring their 2” mortar into action attempting unsuccessfully to lay a smoke screen on a 5.cm open emplacement in Riva Bella.

The immobilised DD at the water’s edge and a 2” mortar from South Lancs HQ Company both successfully lay a smoke screen on the 7.5cm casemate in Cod, while an AVRE on the far-west of the beach destroys the 5.0cm doppelschartenstand bunker with a Petard shot.
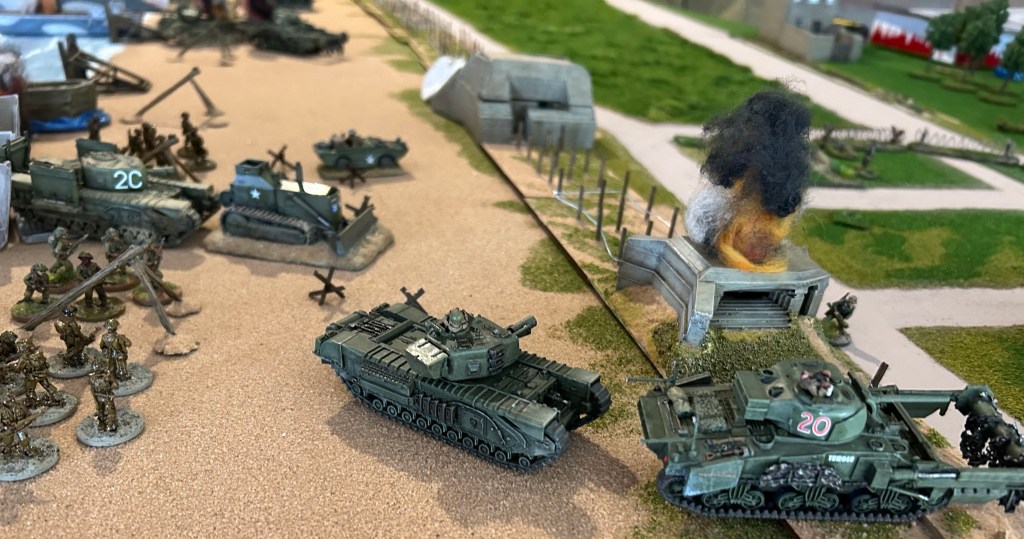
British casualties continue to mount across the beach. The East Yorks lose another five men including their PIAT and signaller and a Naval Fire Control Party is wiped out when their Ford GPA takes a direct hit from Cod. While Sherman Flail 20 is flailing through wire entanglements, an infantryman creeps behind the shattered 5.cm bunker and fires off a panzerfaust into the Sherman’s flank. That’s both flails now destroyed.
MG tobruks, Morris and Daimler all continue firing upon the South Lancs crawling up the beach, though the barrage is ineffective.
TURN SEVEN
All forces not stalled/immobilised apart from 2” mortars and Naval Fire Control Party move forward. South Lancs 2” mortar again lays smoke on Cod’s 7.5cm casemate, but all other fire from mortar, DD and AVRE is ineffective.
However this turn the German fire doesn’t quite hit the mark either, given the amount of weapons fired the British only take two casualties among the South Lancs. A positive in the number of knocked out vehicles across the beach? Cover for the slowly advancing British infantry!
TURN EIGHT
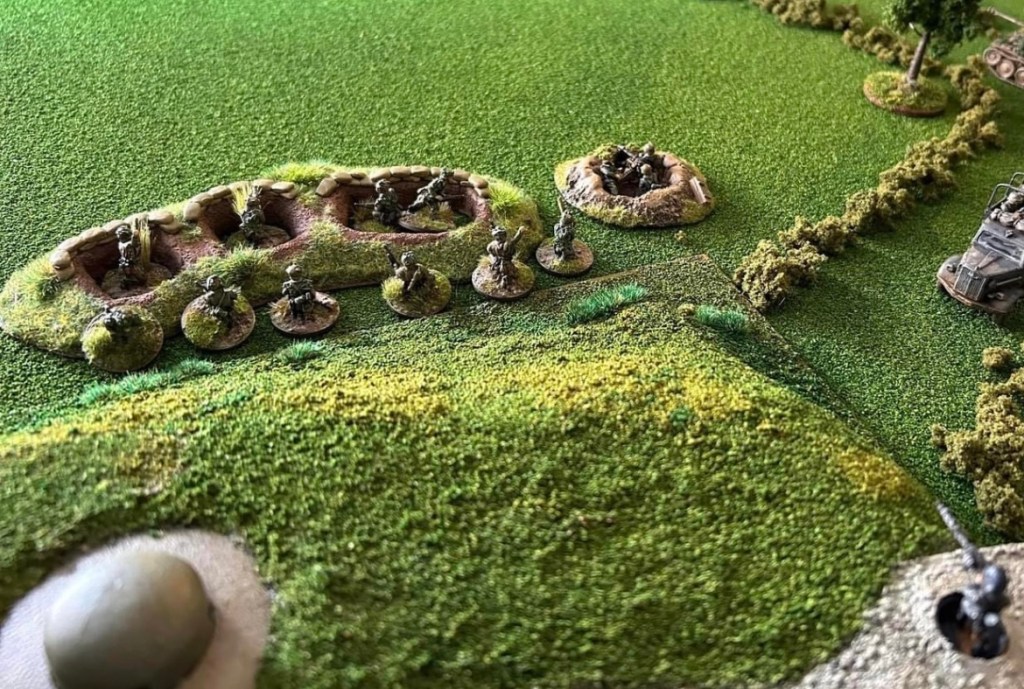
As we enter mid-game infantry continue to crawl forward with some now making cover at top of the beach, others cautiously advancing among the knocked-out tanks.
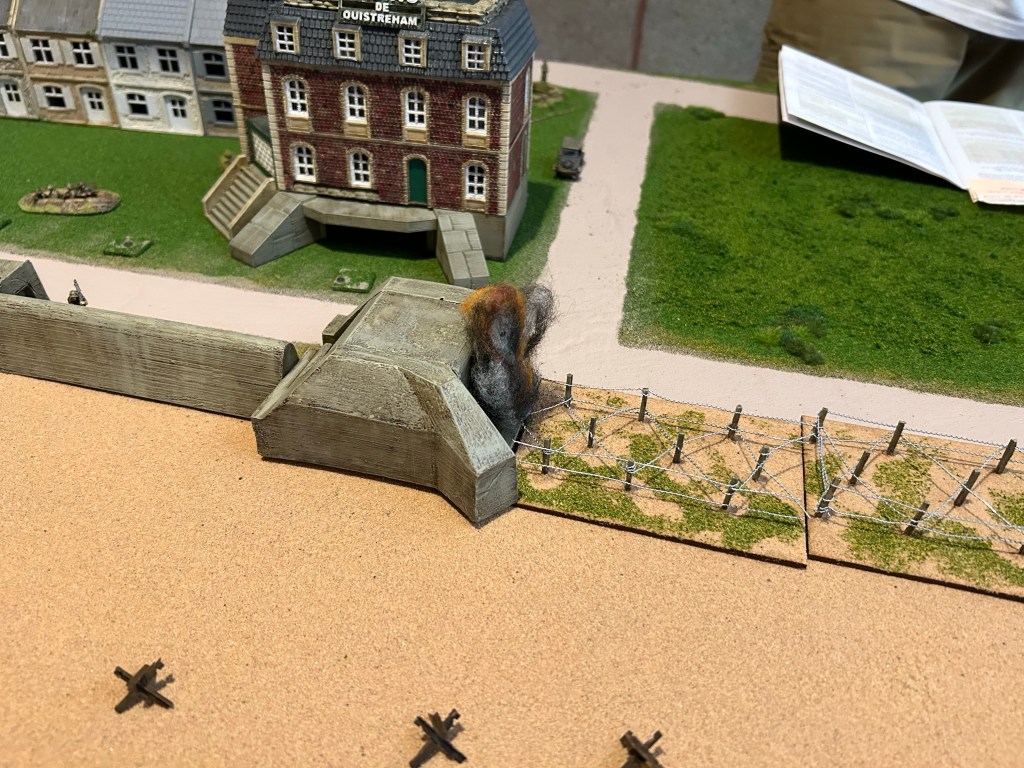
AVREs are creating a breach in barbed wire in front of Cod. I also manage to successfully call in a salvo of 150mm rounds onto Riva Bella, demolishing part of the sea wall. LCMs and LCTs retire from the beach to bring in further waves. These should have retired a couple of turns ago!
By now the dice gods have returned for Ian, and while Morris misses yet again, Daimler hits home and the East Yorks suffer further casualties. A dug-in mortar behind Cod lands a shell amongst the South Lancs who also come under small arms fire from one of the Twin Villas, losing another two casualties.

On the far side of the beach East Yorks HQ Company also receive small arms fire, this time from Casino de Ouistreham, losing their 2” mortar and triggering a morale test which they pass.
Now that I’ve received fire from the Twin Villas and Casino they will be legitimate targets when my next waves land.
TURN NINE
Wave 5 approaches having been held back due to drifting and congestion. I call another naval bombardment onto Riva Bella which takes out an MG tobruk on the beach, though missing the 5.0cm gun I wanted to hit.
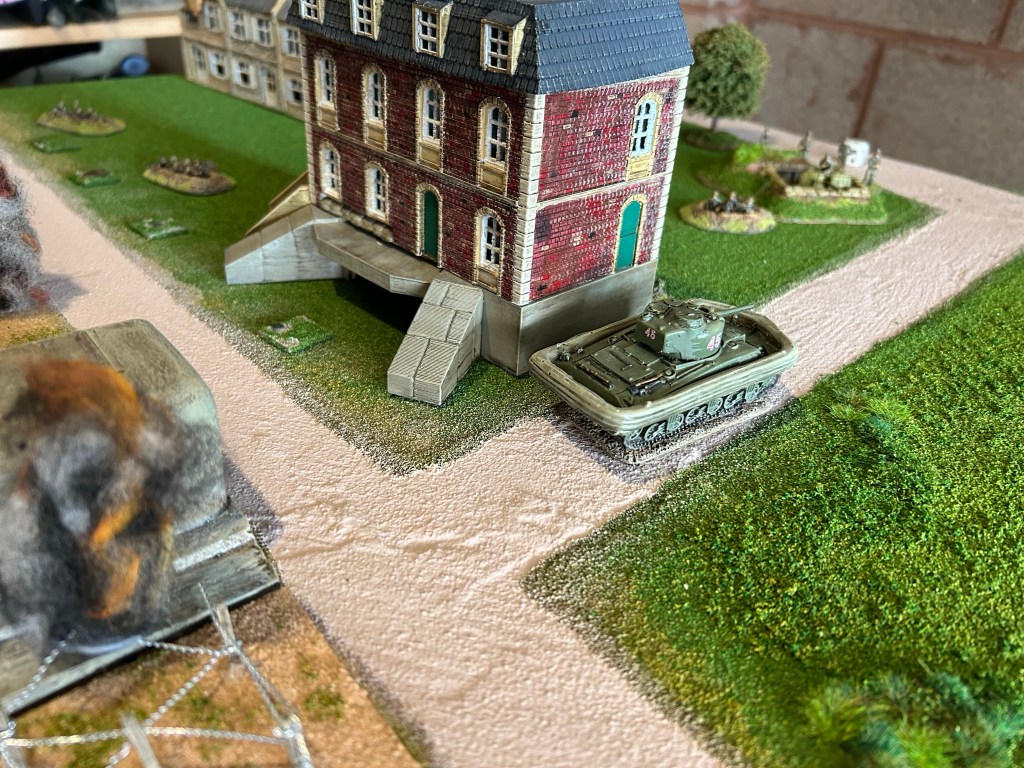
I now let rip against the left hand villa of ‘Twin Villas’. An AVRE rakes the building with its BESA machine gun while the remaining South Lancs – with something to finally shoot back at – open up with small arms fire. Ian takes three casualties in the villa. At the eastern end of the beach the Casino receives fire from a DD, taking a casualty in the process.
Daimler and Morris continue to bombard the landing beach. Morris yet again misses while Daimler inflicts four casualties on the East Yorks. Infantry in the Casino also take shots at them, fatally wounding the CO East Yorks.
Meanwhile the Twin Villa defenders continue small arms fire on the South Lancs, their fire joined by a mortar dug in at the rear of Cod. More casualties; now the East Yorks and South Lancs are looking fragile having taken heavy losses. The East Yorks are shaken enough to take a morale test, passing it and pressing on.
TURN TEN
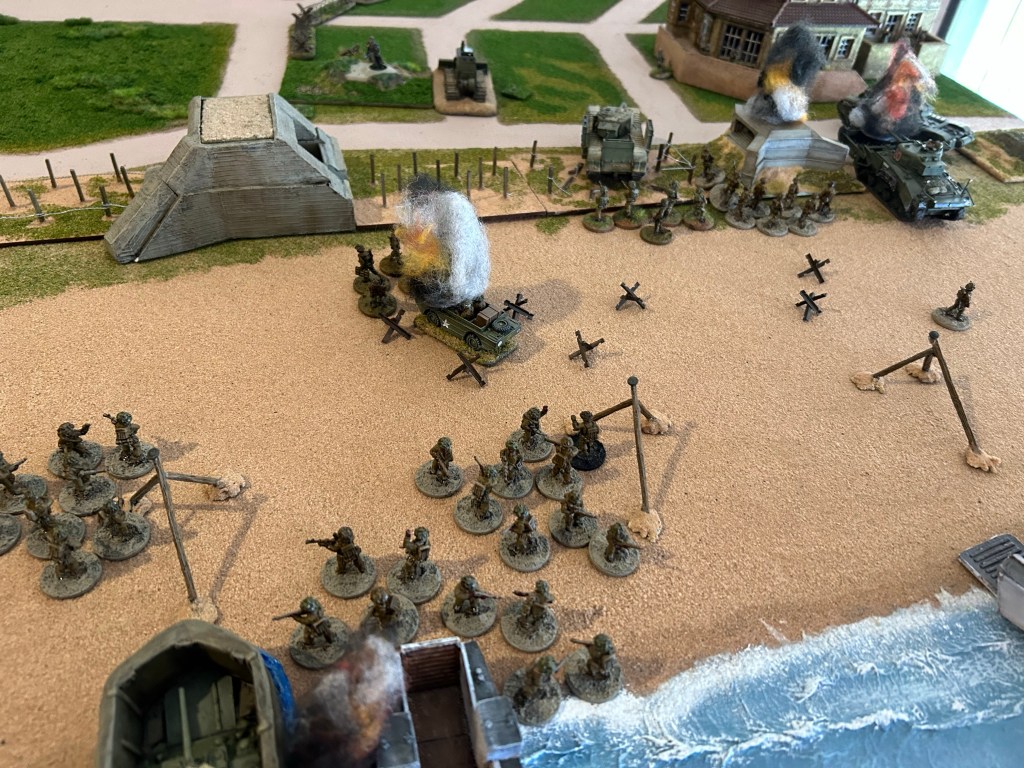
Turn Ten sees general movement forwards up the beach. An Armoured Dozer is first to pierce the defences and get onto the first lateral road beyond the beach and dunes in front of Cod. AVRE crews are desperately reloading petards for the big push to clear Cod.
Wave 5 lands, and not surprisingly given the luck of the dice (or tidal conditions) all four craft drift. Amongst the LCMs and LCT seven casualties are cause by hitting mined obstacles.
At the eastern end the British inflict minimal casualties (one!) as fire is mostly ineffective from a naval salvo, Sherman and DD. Small arms fire from the South Lancs into Twin Villas causes noise but little else.
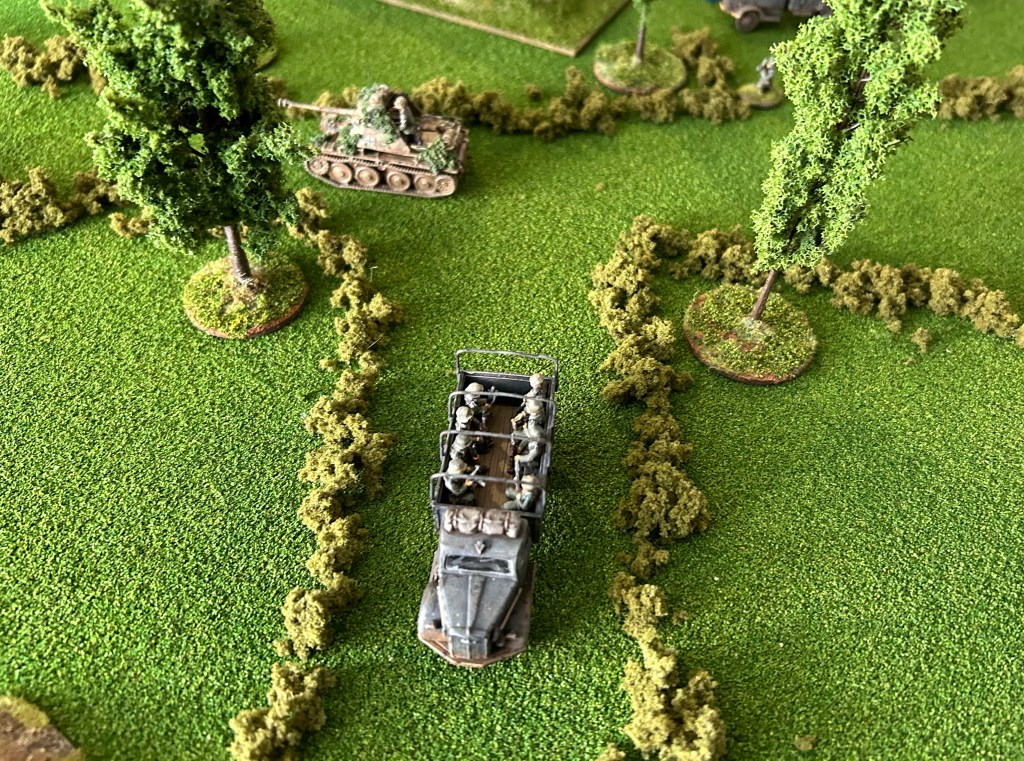
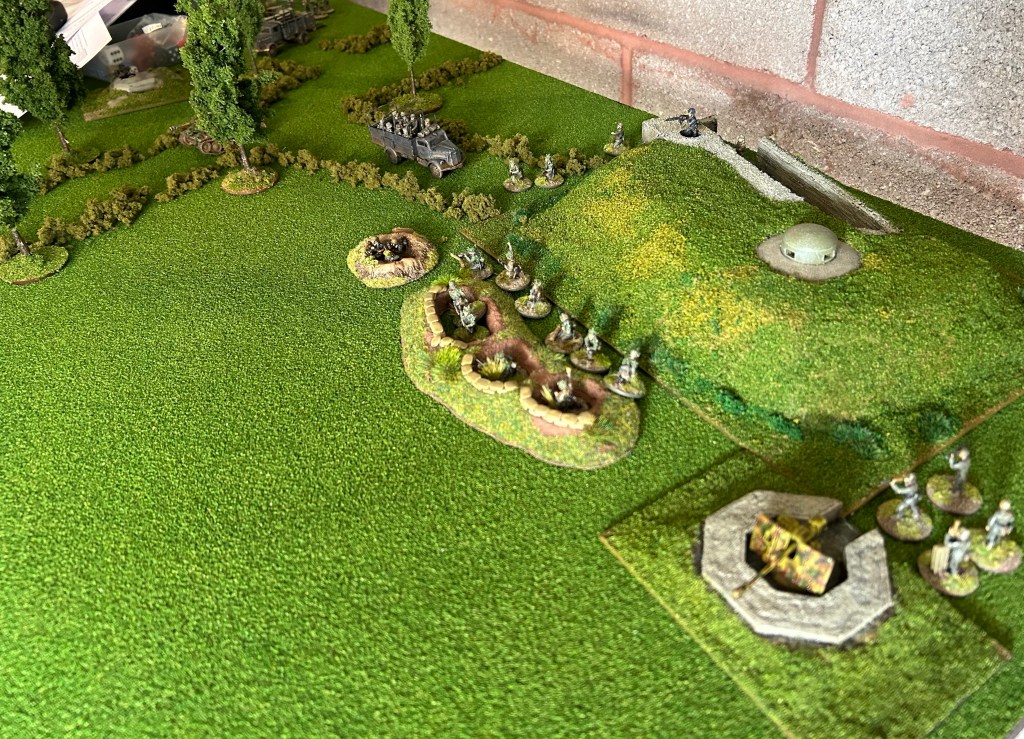
As per the scenario Ian’s reinforcements enter on the Hermanville road, a Marder and a company or two of infantry. I might be in some trouble now.
At both ends of the beach German fire pours into assaulting British Troops. A Naval Fire Control Party in support of the East Yorks is neutralised, plus IDF from Daimler and Morris finds another casualty amongst the battered battalion. Again they’re shaken and take a morale test – pass! Must be some medals or at least mentions in Despatches for them!
The South Lancs take a trio of casualties due to continued small arms fire from the Twin Villas, triggering a morale test. A quick roll of the dice and they pass, though how long they can go on I don’t know.


TURN ELEVEN
With the clock running down, and Monty’s voice ringing in the minds of the troops, there’s a push forward by all British forces. I’ve got to get things moving, the infantry and armour has been on the beach too long. While crawling the infantry have presented harder targets they haven’t really moved with elan! Company commanders across the beach exhort their men to get on their feet!
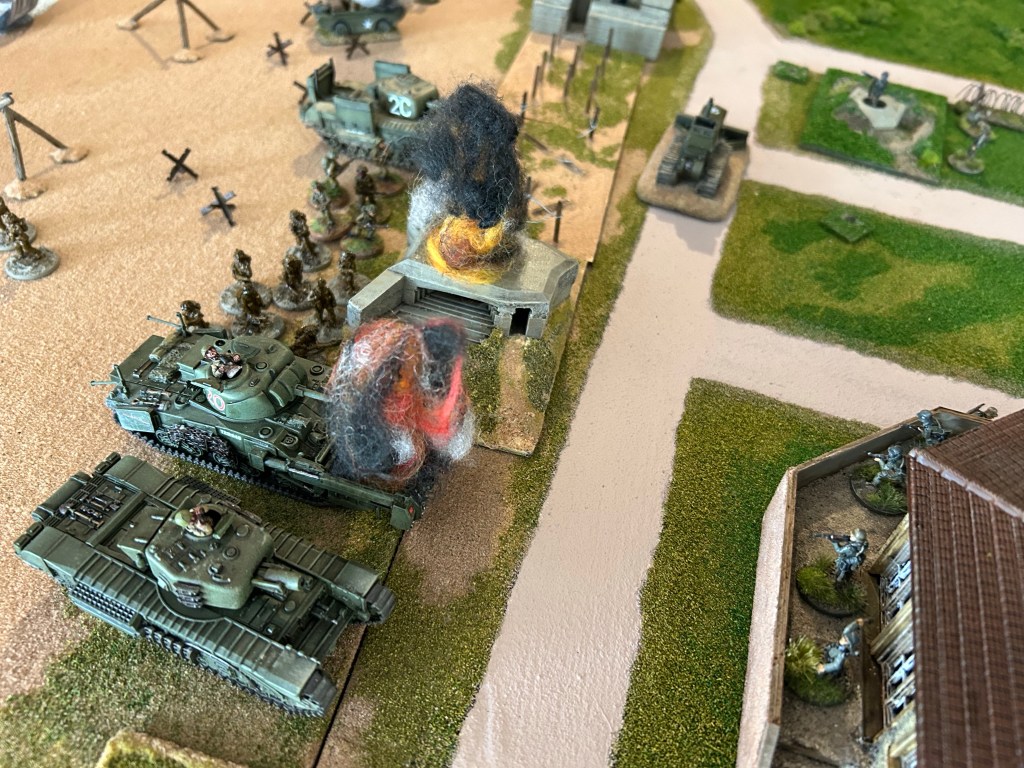
An AVRE, surviving South Lancs infantry and the fresh Suffolks all pour fire into the Villa causing a pair of casualties. AVRE 2C fires it’s petard and destroys the flanking 7.5cm and Casemate. At Riva Bella a Priest of 76th Field Regiment RA pounds the Casino. Two casualties. The sole mobile DD reaches barbed wire entanglements near the Casino, taking a shot at the building but causing no casualties. Further fire from the few forces on the eastern beach all miss the 5.0cm emplacement. Surely it must be destroyed soon!
Ian’s turn and my day, or more accurately that of the assault forces, is about to get worse. South Lancs receive more incoming fire from small arms, mortar, Daimler, MG Tobruk. A stinging six casualties for a hammered battalion, unsurprisingly causing a morale test. Failed! Damn. 1st Battalion South Lancs have taken all the punishment they can, and hit the sand.
The East Yorks are still under small arms fire from the Casino and take further casualties triggering another morale test. The dice rolls, they fail. The 2nd Battalion East Yorks have literally been knocked for six over the last few hours, now going to ground and taking no further part in the action.
A maximum four turns remaining and the chances of the British securing more than one or two of the five objectives looks remote. However there’s a fully intact battalion closing on Cod. If only I hadn’t inexplicably forgotten about 4 Commando who were somewhere in the Channel awaiting approach…
At this point Ian pulled his OP out of the Casino back towards Hermanville, losing Daimler for IDF.


TURN TWELVE
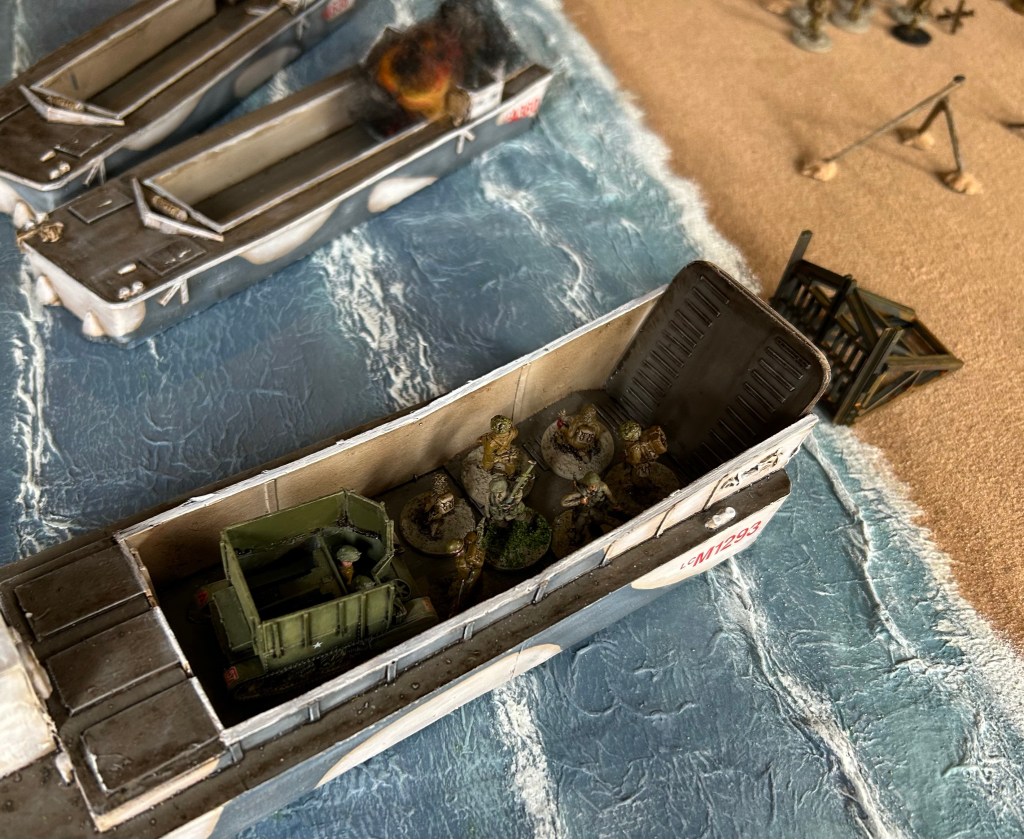
All forces apart from AVREs (reloading their petards) move forward and LCM 1293 approaches the beach carrying 2nd Middlesex with a much needed 4.2 inch mortar and my final Naval Fire Control Party.
AVRE BESAs and the Suffolks all pour fire into the Twin Villas, causing three casualties. On the eastern side of the beach all remaining vehicles fire rounds toward the Casino and 5.0cm emplacement, with no hits.
However the solo DD continues to move on from Ouistreham towards Daimler, causing a casualty by landing a HE round in the gun emplacement.
This turn German fire is ineffective – no rounds hit home from Daimler, Riva Bella or Cod. Even a rather sneaky fellow who pops out and takes a shot with his panzerfaust at an Armoured Dozer misses at point blank range.
TURN THIRTEEN
Turn Thirteen starts around 1545. It’s getting late in the day and we’re getting close to turn 16. Can the Brits make it? Are their fortunes about to turn?
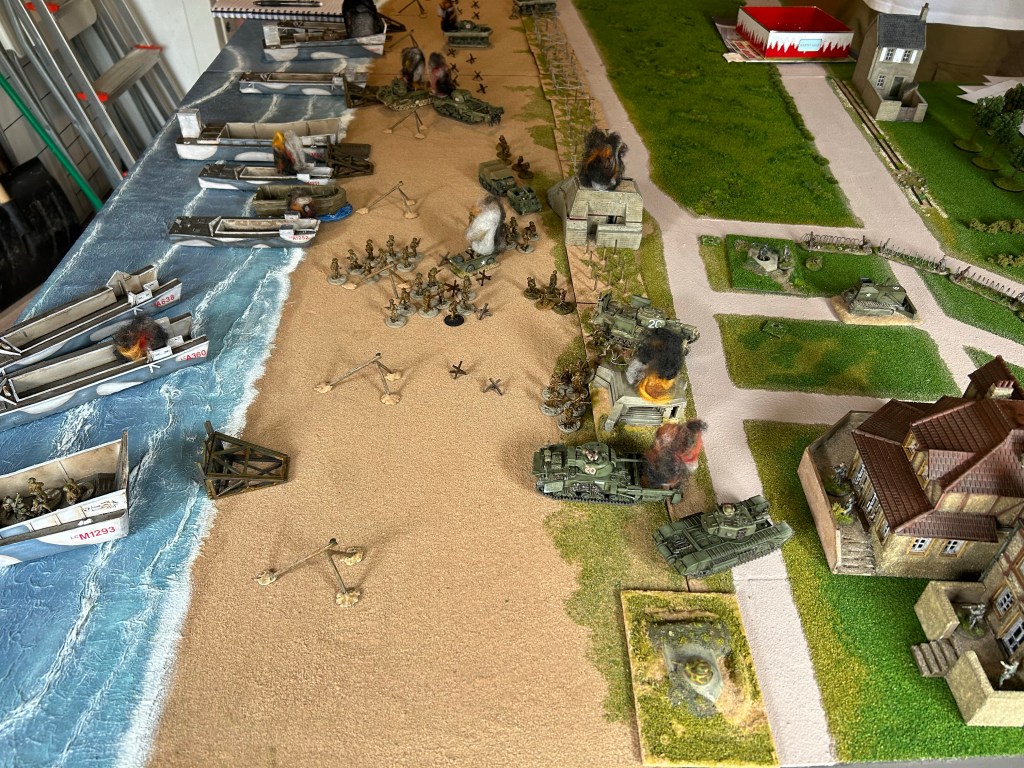
While LCM 1293 hits the beach including my much needed final OP team, the remaining AVREs move onto the first lateral road in front of Cod. DD fires on Daimler, Priest on Casino. One casualty for each. M10 and Sherman continue firing rounds into Riva Bella’s 5.0cm emplacement, again no effect.
The first AVRE shoots at the penultimate Cod Tobruk: hit! AVRE 2C launches a petard round at the final MG Tobruk at Cod: hit! Both destroyed, neutralising the last potent defences of Cod.
Now if I can get the Suffolks and AVREs to Morris and Hillman, and the DD plus Sherman and M10 to clear Riva Bella and Daimler, I could do it.
At this point Ian retires his remaining infantry company in the second villa, back towards Hillman.
TURN FOURTEEN
You remember 4 Cdo I mentioned earlier? I remembered them now. I bring them onto approach in an LCI(S).
My forces continue their push through the grounds around Cod, while finally I make some progress with Riva Bella. Between a Sherman and M10 they destroy the 5.0cm emplacement, while the Priest clears the Casino by inflicting a final casualty on the defending infantry. Meanwhile my DD takes a pop at Daimler again, another casualty. Another hit on target and it might cause a surrender.
But it’s not to be; Ian brings a ‘Faust out from behind the Casino and launches the explosive into my DD at point blank range. With my DD in flames Daimler is now out of reach.
I’ve got to invest Cod, clear Riva Bella, and move quickly onto Morris and Hillman to play for a draw.
TURN FIFTEEN
No time to lose, Suffolks surge through the Cod defensive perimeter while AVREs advance onto the second lateral road behind Cod in the direction of Hillman. The Suffolks’ vehicles converge on the wire just in front of Cod alongside the Middlesex Carriers.
LCI(S) 523 attempts to land, drifts and hits a mined Belgian Gate incurring three casualties. The Commandos won’t make it off the beach in time, I make the call to leave them where they are.
M10 and Sherman start firing on AT wall Tobruks to clear some of the remaining forces at Riva Bella while the Priest moves to beach exit two near the Casino.
Meanwhile AVREs spot the infantry company retiring from Cod in the open and both get a burst of BESA off before the infantry get to cover. Only one casualty inflicted!
Next I attempt to call in one of my last naval bombardments to soften up Hillman, but fail to make contact.
German infantry continue to fall back from Cod towards Hilllman and reach the relative safety of a hedgerow. The OP now set up in Hermanville calls in some artillery support, directing fire onto the remaining AVREs; AVRE 2C being destroyed.
Realistically with one turn to go, there isn’t enough time for the British to secure a win, but we play through the final turn.
TURN SIXTEEN
My surviving AVRE breaches hedgerows behind Cod toward Hilllman, firing a petard round at a 5.0cm emplacement there. Hit and destroyed, I like petards!
A platoon of 2nd Middlesex and two companies of the Suffolks invest the Cod objective, while two further companies of the Suffolks move off towards Hillman.
In a final act, a naval bombardment of 2x150mm guns plasters the Riva Bella complex clearing a dug in platoon of infantry, while the Priest bombards Hermanville destroying the OPs Kubelwagen.
At this stage all the German defenders can effectively do is fire two ‘fausts from just behind the hedgerow into the AVRE as it crashes through. Both miss at essentially point blank.
RESULT
We then called the game at 1645 following the end of turn 16. As Ian held Riva Bella, Daimler, Morris and Hillman it was a clear German victory.

Many thanks to Ian for a very fun and enjoyable first game of RFR and for making the trip. It was a good playtest of the scenario and boards, and we both learned much! Good banter too. Importantly while I lost it didn’t feel like a loss as the game, sportsmanship, and experience were all cracking.
I’m now very much looking forward to the next one!

Nice looking game.
There are a lot of watercraft there. Impressive.
LikeLike
Thanks – there will be a few more on the table next year 😉
LikeLiked by 1 person